In the field of Non-Destructive Testing (NDT), ensuring the integrity of critical components in industries such as oil and gas is essential. An advanced technique that has been gaining prominence is Phased Array Ultrasound Testing (PAUT), especially when applied to the examination of stainless steel and dissimilar welds, the latter typical in the construction of pipelines or components with internal coating (cladding) of corrosion resistant material (CRA) such as certain austenitic stainless steels and high nickel alloys.
This article delves into the importance, methodology and advantages of using PAUT to inspect these types of joints.
Challenges in stainless steel weld inspection
Corrosion-resistant alloy welds play a critical role in the construction of pipelines that transport corrosive substances. Austenitic stainless steel tubes and sheets and internally clad CRA (Corrosion Resistant Alloy: such as austenitic stainless steels or high nickel alloys) steel have seen increased use due to their greater corrosion resistance. In the case of pipes with internal lining, only the inner surface of the pipe is coated with a layer of CRA in order to maintain the economic value of the pipe construction.
However, the metallurgy of welding austenitic material, as well as those of high nickel content alloys, present highly anisotropic and non-homogeneous structures, which introduces difficulties in the application of the ultrasound testing method such as attenuation and redirection. of the ultrasonic beam, causing thorough inspection and the use of special procedures and devices to be imperative to identify possible defects that could compromise the integrity of the welded joints.
Phased Array Ultrasound Test (PAUT)
Phased Array Ultrasound Testing (PAUT) is an advanced ultrasonic inspection technique that uses multiple transducer elements and electronic delays to create and control ultrasonic beams. This dynamic control allows adjustment of beam angles and focal points, providing inspectors with unparalleled flexibility when scanning complex geometries, such as coated pipe welds.
Probe configuration
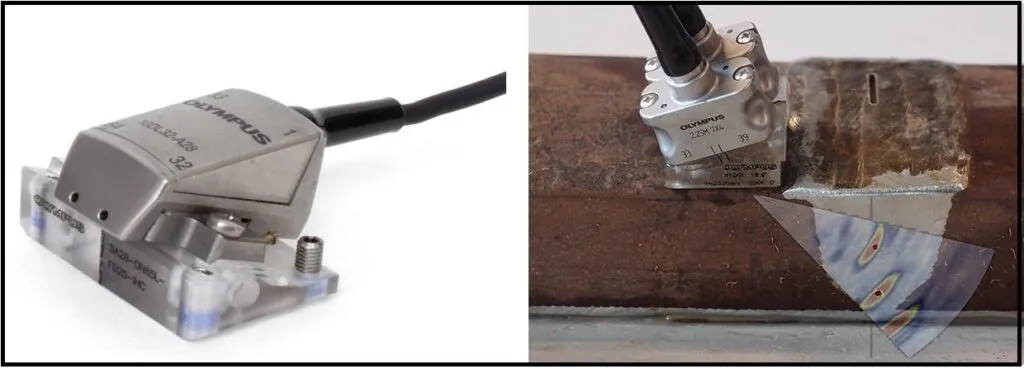
The application of the PAUT method consists of the use of a series of transducer elements that can be electronically controlled to emit ultrasonic waves. Specific probe configuration is important to optimize the inspection of corrosion-resistant alloy welds. Typically, probes with linear array or array array transducer elements at various frequencies are used to ensure comprehensive coverage.
Specifically for volumetric inspection of stainless steel welds and dissimilar austenitic metallurgy and high nickel content alloys typically used in the manufacture of bimetallic pipes (carbon steel substrate with internal coating or CRA cladding), the use of transmission-reception longitudinal wave (TRL) probes is recommended. dual linear array (DLA) probes which have a fixed depth of focus, or better yet using dual array longitudinal wave probes (DMA ) with which focusing can be programmed at different depths.

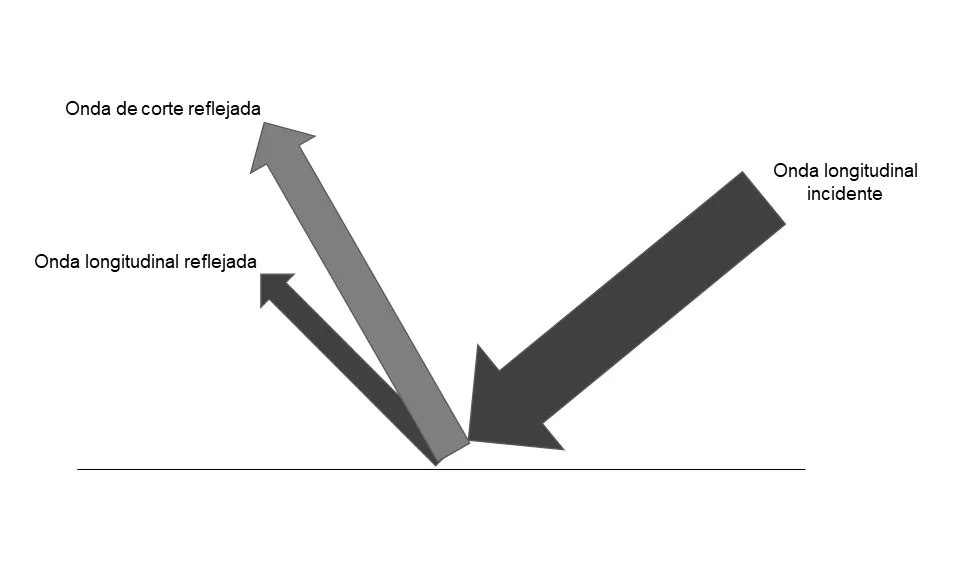
The justification for using longitudinal waves is due to the fact that these waves experience less influence due to the anisotropy and metallurgical non-homogeneity of the filling material, covering this inspection only in part of the path, since by affecting the rear wall most of this Energy will be transformed into transverse waves which will be easily attenuated.
For inspection of the heat affected zone in the root edge area for the detection of flaws open to the internal surface, the use of shear wave PAUT probes is recommended, however, a limitation with the use of this probe is that the detection of possible faults is only possible if they are located on the side of the transducer, which is why access to both sides of the weld is required.

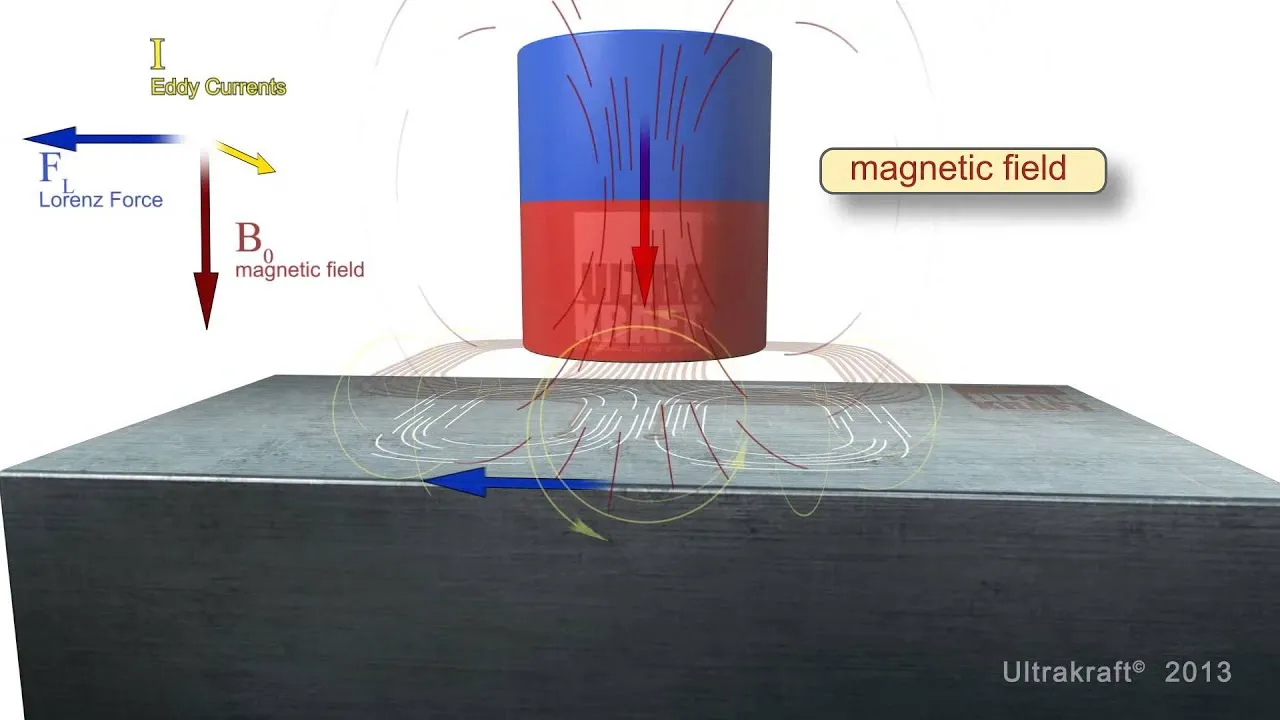
In the event that there is only access to one side of the joint, an option to explore the posterior side of the root through the weld deposit is by using a special probe for the generation of horizontally polarized shear waves. (SH) which is possible through transducers of the EMAT (electromagnetic acoustic transducer) type, which guarantees the best performance and repeatability, while limiting the need for advanced PEC knowledge.
The following video shows the principle of the PEC technique referred to the inspection of coated pipes, a principle that also applies to the bottom inspection of tank floors below concrete among other applications.

Principle of EMAT electromagnetic acoustic transducer. Video courtesy of Ultra Kraft.
On the other hand, the crown of the joint requires to be evaluated using surface waves which can be executed with pulse echo transducers or apply other NDT tests such as Eddy Currents or ACFM.
Calibration
Calibration is a critical step in ultrasound inspection to ensure accurate and reliable results. The system is calibrated using reference blocks that simulate the material and geometry of the weld. This process ensures that ultrasonic waves are properly transmitted and received, allowing for accurate defect detection.
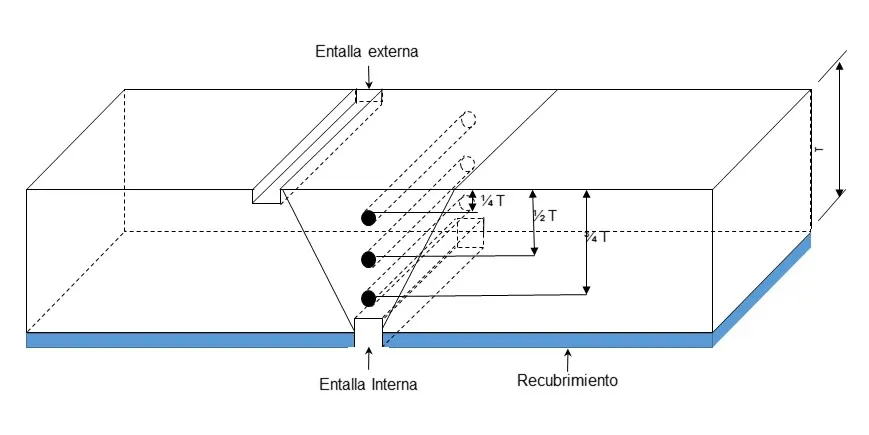
For the inspection of stainless steel and dissimilar welds with austenitic filler material or high nickel content alloys, calibration is required on an amplitude basis by preparing reference curves using replicas made with the same welding procedures. used in production and that include the design of appropriate flaws (holes and notches) as recommended in paragraph T-451 of article 4 of section V of the ASME code.

Exploration technique
It is required to inspect the weld volume using longitudinal wave transmission – reception (TRL) probes, recommending the use of dual linear array (DLA) or dual array array (DMA) probes. The probe should be positioned and direct the ultrasonic beam so that the largest volume of the weld is covered. It should be noted that this inspection only covers one leg of the beam path.
On the other hand, it is required to explore the internal area around the root on both sides of the welded joint by using transverse waves (linear array PAUT probe) to rule out the presence of faults connected to the internal surface and crown by waves. superficial (conventional probe), the latter being able to be replaced by Induced Current or ACFM tests. Likewise, it is required to sweep with shear waves parallel to the joint to rule out faults transverse to the weld.
Advantages of the Phased Array Ultrasound test
- Higher Sensitivity: The PAUT offers improved sensitivity to detect smaller defects compared to conventional ultrasonic testing methods. This is crucial when dealing with corrosion-resistant alloy welds, as even minor defects can lead to catastrophic failure.
- Real-time images: One of the notable features of the PAUT is its ability to provide real-time images of the inspected area. This not only helps in detecting defects, but also allows immediate decisions to be made about the integrity of the weld.
- Versatility in Inspection: The adaptability of the PAUT allows the inspection of various materials, thicknesses and geometries. This versatility is particularly advantageous when dealing with the complex structures of coated pipes.
- Reduced inspection time: The PAUT’s ability to inspect a large area in a single scan significantly reduces inspection time compared to traditional methods. This efficiency is crucial in industries where minimizing downtime is a priority.
Conclusion
Phased Array Ultrasound testing has emerged as a crucial element in the inspection of corrosion-resistant alloy welds in coated pipelines. Its advanced capabilities, including increased sensitivity, real-time imaging, versatility, and reduced inspection time, make it an invaluable tool for ensuring the structural integrity of critical components in industries where corrosion resistance is paramount. As technology continues to advance, PAUT is expected to play an even more significant role in improving the reliability and security of infrastructure in various sectors.
References
- YIXIN LIU. Phased Array Ultrasonic Testing of Corrosive Resistant Alloy Girth Weld of Cladded Pipes using the Total Focusing Method; Consulted on January 16, 2024. https://tspace.library.utoronto.ca/bitstream/1807/101321/2/Liu_Yixin_%20_202003_MAS_thesis.pdf
- CARLOS ALVAREZ. Inspection of austenitic stainless steel welds using phased array ultrasound; Consulted on January 17, 2024. https://inspenet.com/articulo/soldaduras-de-acero-inoxidable-austenitico/
- André Lamarre. Improved Inspection of CRA-Clad Pipe Welds with Accessible Advanced Ultrasonic Phased-Array Technology; Consulted on January 17, 2024. https://www.ndt.net/article/wcndt2016/papers/fr1a2.pdf
- XCEL INSPECTION. Inspection under Supports using Guided Waves generated by EMAT; Consulted on January 18, 2024. https://xcelinspection.com/inspeccion-bajo-soportes-mediante-ondas-guiadas-generadas-por-emat/
- THIERRY COUTURIER. A quick and safe alternative to inspect welds; Consulted on January 18, 2024. https://www.olympus-ims.com/es/resources/white-papers/a-fast-safe-alternative-for-weld-inspections/

