Flanges play a critical role in ensuring the integrity and operability of pipelines in the industry. However, these components are susceptible to degradation due to corrosion damage, fatigue and mechanical wear. To maintain safety and reliability, regular inspections are essential. Nowadays, among the most advanced techniques, the Phase Array Ultrasonic Testing (PAUT) represents an important tool in the detection of flange defects, ensuring the continuous operation of pipelines.
In this article, the importance of PAUT in flange inspection is discussed, focusing particularly on inspections of the inner flange bore, corner edge and raised seal face.
Types of corrosion in flanged joints
Corrosion in flanged joints is a widespread problem in a variety of industries, posing significant risks to infrastructure integrity, safety and operational efficiency. Flanged joints are fundamental components in piping systems, connecting pipes, valves and other equipment. However, exposure to corrosive environments can cause various types of corrosion, compromising the structural integrity of these joints.
Several types of corrosion commonly affect flanged joints:
- Uniform corrosion: This type of corrosion occurs uniformly on the flange surface, causing loss of material over time. Although it may initially appear less harmful, prolonged exposure can weaken the bond and lead to leakage or failure.
- Pitting corrosion: This is a type of localized corrosion in metals and alloys. Small holes are formed in the metal surface of the flanges, weakening their integrity. This process is due to the presence of oxygen, moisture and contaminants in the environment.
- Crevice corrosion: Flanged joints often contain spaces or crevices where corrosive agents can accumulate, leading to crevice corrosion. This type of corrosion occurs in confined spaces, which makes detection and mitigation difficult.
- Galvanic corrosion: Occurs when dissimilar metals are in electrical contact forming a galvanic coupling in the flange assembly. This electrochemical process accelerates corrosion at the interface between the metals, leading to accelerated degradation of the bond.
What is the Phase Array Ultrasound Test (PAUT)?
PAUT is a non-destructive testing method that utilizes an array of multiple ultrasonic elements that when activated in a programmed or phased sequence generate beams that can be steered, focused and swept through a range of angles, allowing precise inspection of complex geometries and providing detailed information on the internal structure of materials with high efficiency in the production of the inspection service. This technique is ideal for assessing the integrity of in-service pipelines, including the detection of flange defects.
Challenges of flange flaw detection
Challenges arise during the inspection of flanges due to their intricate geometry and their role in pipeline operations. Traditional inspection methods often provide comprehensive coverage and accurate defect detection, on problematic flange surfaces such as the inner flange bore (1), the corner edge (2) and the raised sealing face (3) adjacent to the corner, where defects can manifest themselves differently. Figure 1 shows each of the above-mentioned parts1.
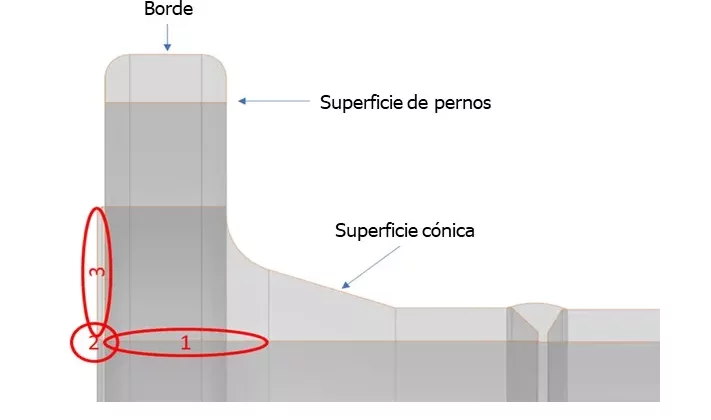
Sweeping surfaces with PAUT for flange inspection
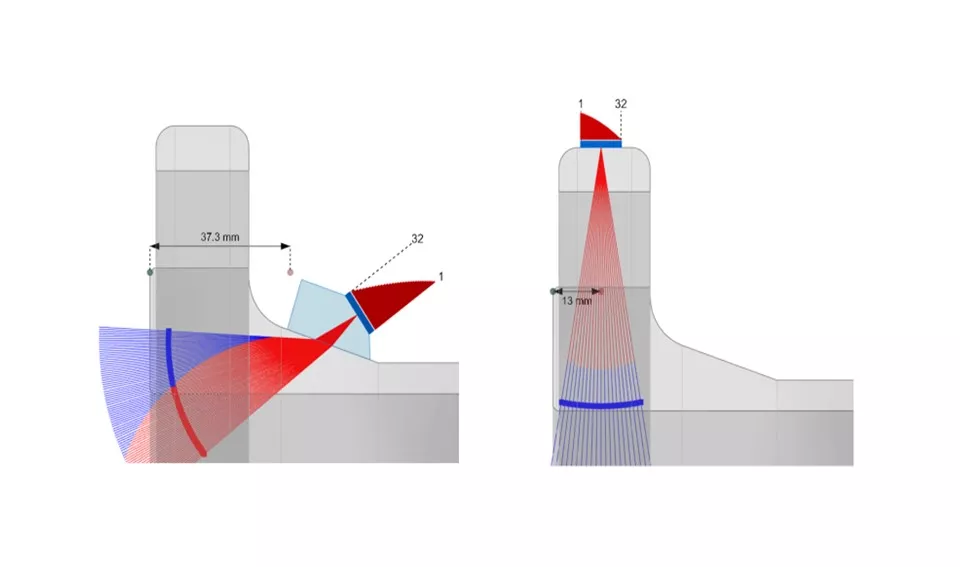
- Inspection from tapered surface: From the tapered surface of the flange, a raised seal face section, the corner edge and the flange bore adjacent to the corner can be inspected for flange defects (Figure 2)1.
- Inspection from the edge surface (between bolt holes): From the edge surface it is possible to detect flange defects with high accuracy, such as undercuts on the seal face of the flange, wear on the edge of the corner and corrosion on the inner surface of the flange near the corner. The limitation is that this scan is performed between the bolt holes, so it is not possible to inspect the critical faces in their entirety.
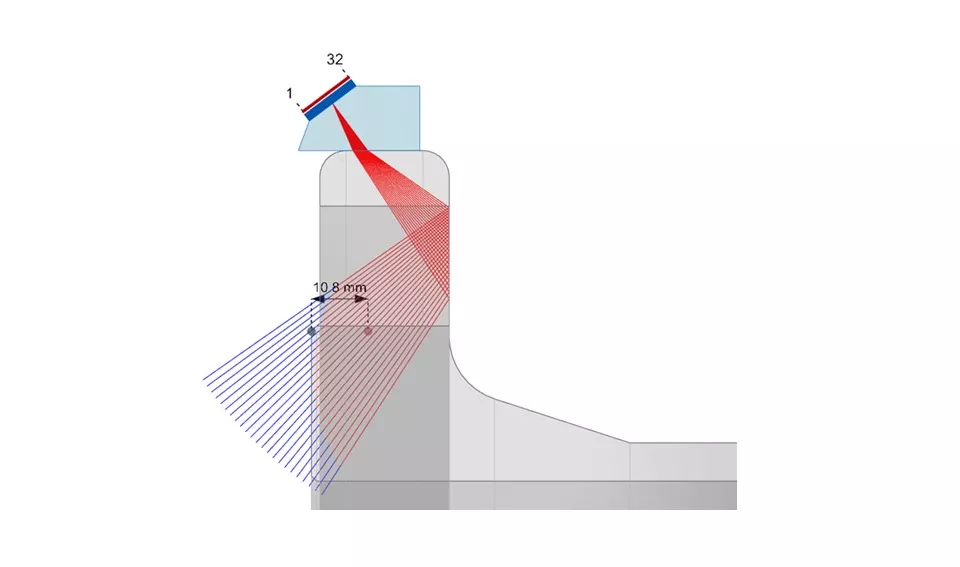
- Inspection from the bolt surface (between the nuts): From the bolt surface it is possible to detect with high accuracy flange defects such as undercuts on the flange seal face, wear on the corner edge and corrosion on the inside surface of the flange or bore near the corner. The limitation is that this scan is performed between nuts, so it is not possible to inspect the critical faces in their entirety from this position.
Advantages of PAUT in flange inspection
- High resolution: PAUT offers superior resolution compared to conventional ultrasonic testing methods, allowing detection of smaller flange defects with greater accuracy.
- Efficient inspection: PAUT’s dynamic beam steering capability enables fast scanning of complex geometries, reducing inspection time and minimizing downtime of pipeline operations.
- Detailed imaging: PAUT provides detailed images of internal structures, facilitating accurate characterization for defect detection and informed decision making for maintenance and repair activities.
- Safety: By making it possible to detect flange defects at an early stage, PAUT helps prevent catastrophic failures, ensuring the safety of personnel and the environment.
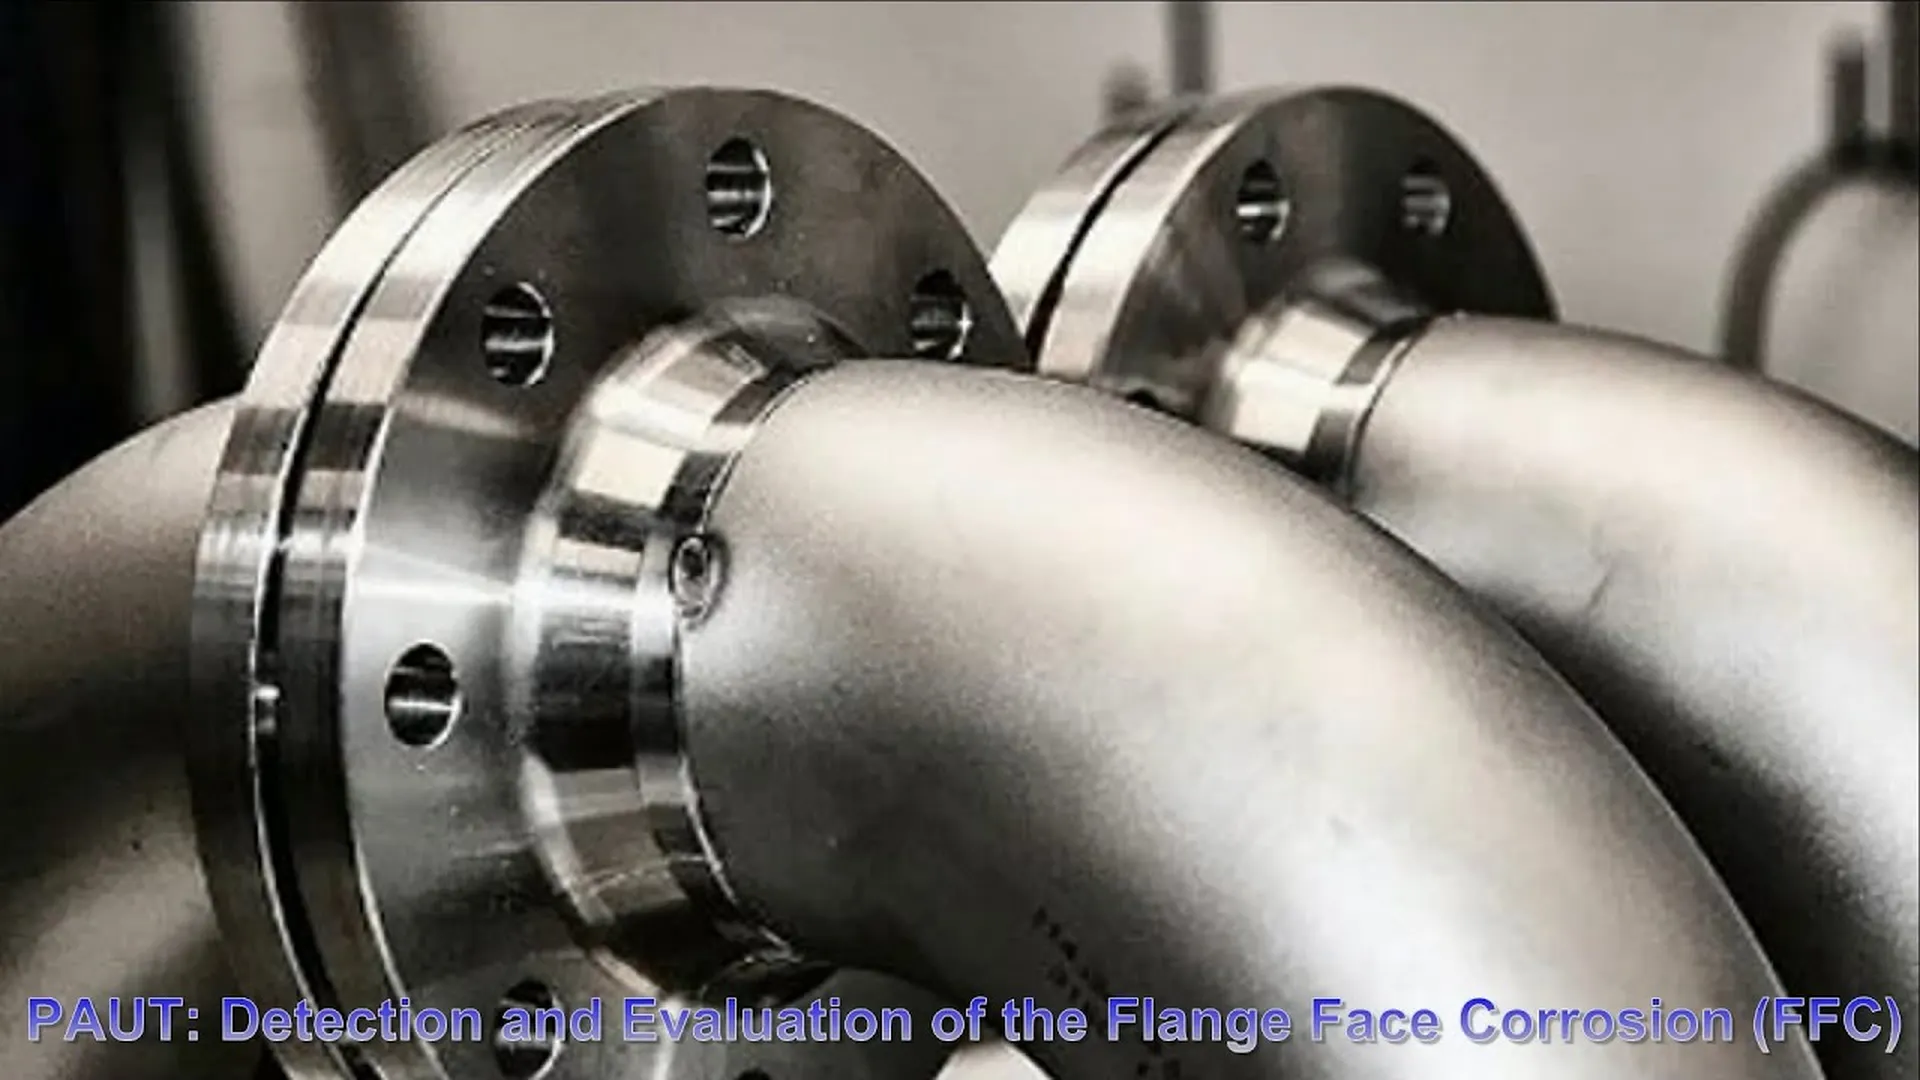
Below is a video on flange face corrosion (FFC) detection and evaluation courtesy of: Sonotron NDT2.
Conclusion
Flange inspection is essential to ensure the integrity and reliability of pipelines in service. Phased Beam Ultrasonic Testing represents an alternative solution for accurate and efficient flange flaw detection. PAUT provides comprehensive coverage and detailed information with inspections performed from conical, edge and bolt surfaces, enabling proactive maintenance and mitigating the risk of unplanned downtime or safety incidents.
Adopting PAUT as a flange inspection technique is critical to preserving pipeline life and maintaining operational excellence in the industry.
Bibliographic references
- FRÉDÉRIC REVERDY. How to Visualize Inspection Data on In-Service Flanges for More Informed Decisions; Accessed February 20, 2024. https://blog.eddyfi.com/en/revolutionizing-flange-inspection-the-power-of-phased-array-ultrasonic-testing-for-detecting-crevice-corrosion
- Sonotron NDT: “ISONIC UT, High Performance Instrumentation and Solutions for Ultrasonic Nondestructive Testing”; https://www.youtube.com/watch?v=q9kR8_pqEi4; accessed 28 February 2024.

