Corrosion poses significant challenges in various industries, leading to structural integrity problems, insecurity and economic losses. Traditional corrosion detection methods often do not provide such accurate and comprehensive assessments of corrosion damage. However, advances in ultrasound testing, particularly the Total Focus Method (TFM), have revolutionized the way material degradation is detected and analyzed in three dimensions (3D).
This article explores the principles behind ultrasonic testing with TFM, its advantages over conventional techniques and its applications in the field of corrosion detection and analysis.
Understanding ultrasound testing and the TFM
Ultrasonic testing involves the use of high frequency sound waves to penetrate materials and detect internal flaws or defects. They have long been used in various industries for nondestructive testing (NDT) purposes because of their ability to provide detailed information about the internal structure of materials.
The Total Focusing Method (TFM) is a sophisticated ultrasound imaging technique that improves the resolution and accuracy of defect detection. The Total Focusing Method (TFM) is an integrated technique to the existing Phase Array Ultrasound (PAUT), which significantly improves flaw detection and characterization, as well as probability of detection (POD) in critical industrial applications.
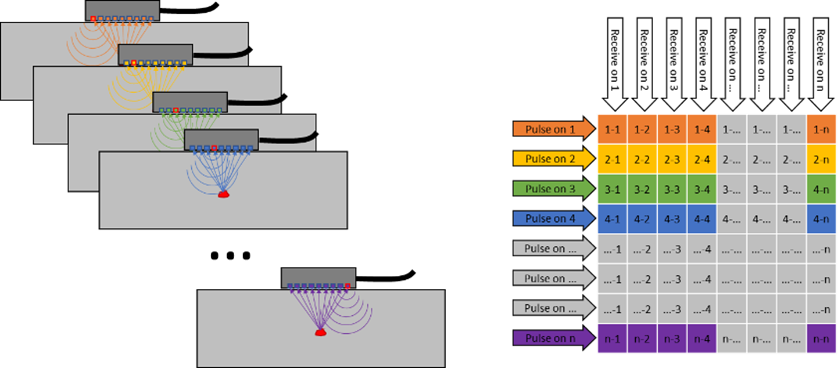
This technique uses an innovative approach where, in a first stage, each element of the transducer is activated individually and information is collected by all elements, this first part of the process is known as Full Matrix Capture (FMC). This information is then processed by algorithms to dynamically adjust the focal point, this second part of the process known as Total Focusing Method (TFM).
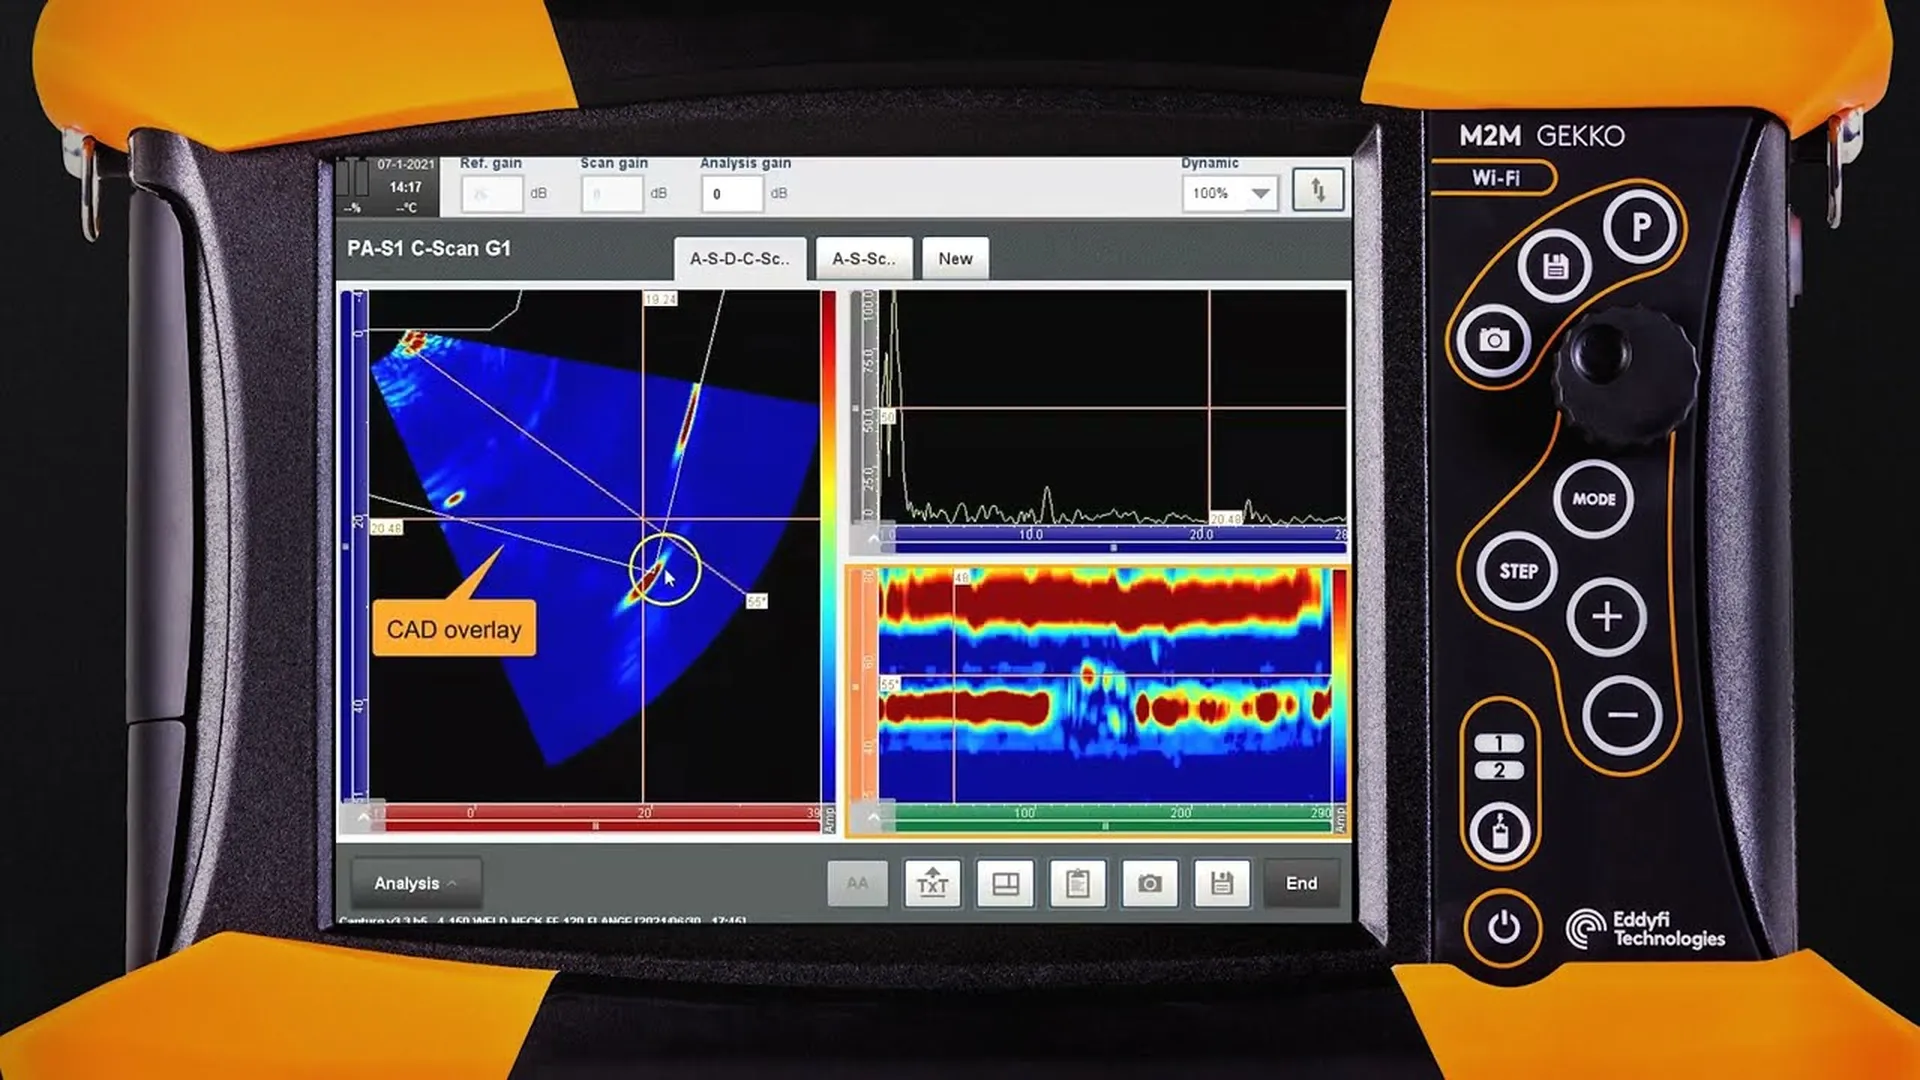
This technology provides detailed images of the internal structure of the material with a better signal-to-noise ratio, improving the POD and allowing the identification and accurate characterization of defects such as cracks, inclusions and porosity, and 3D representations in corrosion analysis.
More recent developments such as the Total Intermodal Focusing Method TFMiTMwhere the program for computation and image formation considers more than one mode of interaction of the ultrasonic beam with the internal characteristics of the specimen, ensuring detection and improving the sharpness and resolution of internal details, taking TFM technology to a higher level.

Importance of 3D corrosion detection and use of TFM
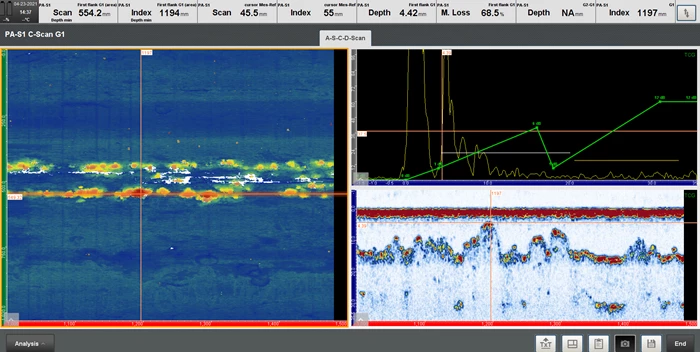
An accurate assessment of corrosion on the internal surface of static equipment such as vessels and pipelines can be achieved through an excellent cartographic representation of this surface, and therefore the mapping must contain a very detailed three-dimensional data set. Providing an accurate representation of the current physical profile and with which to track corrosion evolution during specific maintenance time periods.
Profile evolution is one of the metrics that indicates whether corrosion protection is working or if the life of the asset is shortened, for example. For this purpose it is of vital importance that the technology used is highly repeatable in its results, so it must offer high resolution images for greater detail and thus highly accurate results.
Profile damage can be measured using a high-resolution 3D scanner, which allows recording of line scans and FMT scans for subsequent analysis and provides very accurate measurements. Automated software tools are also used to evaluate defect area and side view characterization using post-analysis algorithms and software cursors, ensuring that the results are repeatable over many data sets for corrosion mapping.

Advantages of ultrasonic testing with TFM
- Improved resolution: TFM’s ability to dynamically focus the ultrasonic beam results in superior resolution compared to conventional techniques. This allows detection of small-scale material degradation features with greater accuracy, even in challenging geometries.
- 3D imaging capability: One of the most significant advantages of TFM is its ability to generate detailed 3D images of corrosion damage. Traditional ultrasound techniques often provide limited information on the depth and extent of corrosion, whereas TFM provides comprehensive volumetric data, allowing engineers to accurately assess the integrity of structures.
- Improved defect sizing and characterization: TFM not only detects corrosion, but also provides valuable information on the size, shape and orientation of damaged areas. This allows engineers to make informed decisions on repair and maintenance strategies, ultimately extending asset life and reducing downtime.
- Versatility and adaptability: TFM can be applied to a wide range of materials and geometries, making it suitable for various industrial applications. Whether inspecting pipelines, storage tanks or critical infrastructure, TFM offers versatility and adaptability to meet the unique requirements of each inspection scenario.

Applications of ultrasonic testing with TFM
- Oil and gas industry: In the oil and gas sector, corrosion poses a significant threat to pipelines, offshore platforms and storage tanks. Ultrasonic testing with TFM enables comprehensive inspection of these assets, allowing early detection of corrosion damage and proactive maintenance planning.
- Aerospace engineering: Aircraft structures are susceptible to corrosion due to exposure to adverse environmental conditions. Ultrasonic testing with TFM helps aerospace engineers assess the integrity of critical components, ensuring the safety and reliability of aircraft fleets.
- Maritime infrastructure: Corrosion of maritime infrastructure, such as bridges, piers and ship hulls, can compromise safety and lead to costly repairs. Ultrasonic testing with TFM provides detailed information on the extent of corrosion damage, facilitating timely maintenance interventions and structural rehabilitation.
- Infrastructure manufacturing: From bridges and tunnels to industrial equipment and machinery, corrosion affects various components of critical infrastructure. Ultrasonic testing with TFM plays a crucial role in ensuring the structural integrity and reliability of these assets, ultimately contributing to operational efficiency and safety.
Conclusions
Ultrasonic testing with the Total Focus Method (TFM) represents a paradigm shift in the field of corrosion detection and analysis. Offering enhanced resolution, 3D imaging capabilities and improvements in defect sizing and characterization, TFM enables engineers to accurately assess the integrity of structures in various industries by mapping the interior of the component with highly repeatable data. From oil and gas facilities to aerospace engineering and maritime infrastructure, ultrasonic testing with TFM plays a vital role in ensuring the safety, reliability and longevity of assets.
As technology continues to evolve, TFM is poised to further advance the field of nondestructive testing, providing innovative solutions to address corrosion challenges in the modern world.
References
- EVIDENT. Use of Total Focusing Method to Improve Multi-Element Ultrasound (Phased Array) Imaging; Accessed February 06, 2024. https://www.olympus-ims.com/es/applications/using-the-total-focusing-method-to-improve-phased-array-ultrasonic-imaging/
- PHILIPPE RIOUX, WILL HAWORTH. Corrosion TFM Study: Improving Inspection Accuracy with 3D Data Interpretation; Accessed on February 07, 2024. https://www.ndt.net/article/ndt-canada2023/papers/Improving_Inspection_Accuracy_with_3D_Data_Interpretation.pdf
- PAUL HILLMAN. Plane Wave Imaging: The Benefits of Total Focusing Method at High Speed; Accessed February 07, 2024. https://www.pnnl.gov/main/publications/external/technical_reports/PNNL-26603.pdf
- PAUL HOLLOWAY, ED GINZEL. TFMiTM Part 2: Improved Imaging with 3D Rendering; Accessed on February 08, 2024. https://www.ndt.net/article/UTonline2021/Paper/14_Holloway.pdf
- Jonathan TURCOTTE, Philippe RIOUX, Jérôme-Alexandre LAVOIE. TFMiTM Part 2: Comparison Corrosion Mapping Solutions using Phased Array, Conventional UT and 3D scanners; Accessed February 08, 2024. https://sonatest.com/application/files/5416/9522/6362/Corrosion_Mapping_Solutions_Comparison_UT-PA-3D_JTurcotte.pdf

