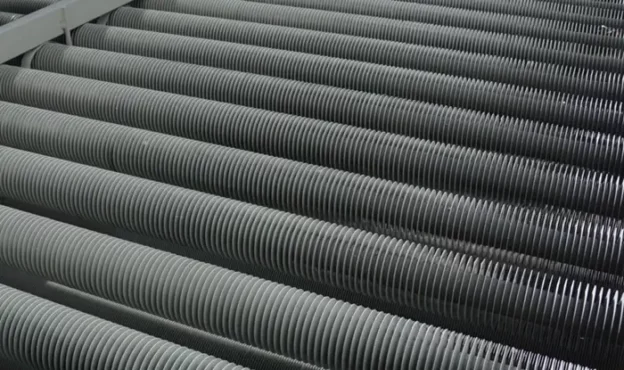
In the field of industrial maintenance and safety, Non Destructive Testing (NDT) methods represent the first line of defense against potential failures and hazards. Among the critical components that require meticulous inspection are the finned air-cooled exchanger tubes, key elements in various industries.
These fin-surrounded tubes are subject to a range of degradation mechanisms over time, including corrosion, erosion and cracking. Therefore, employing advanced NDT methods for inspection is imperative to ensure operational efficiency, prevent downtime and ensure the safety of personnel and assets.
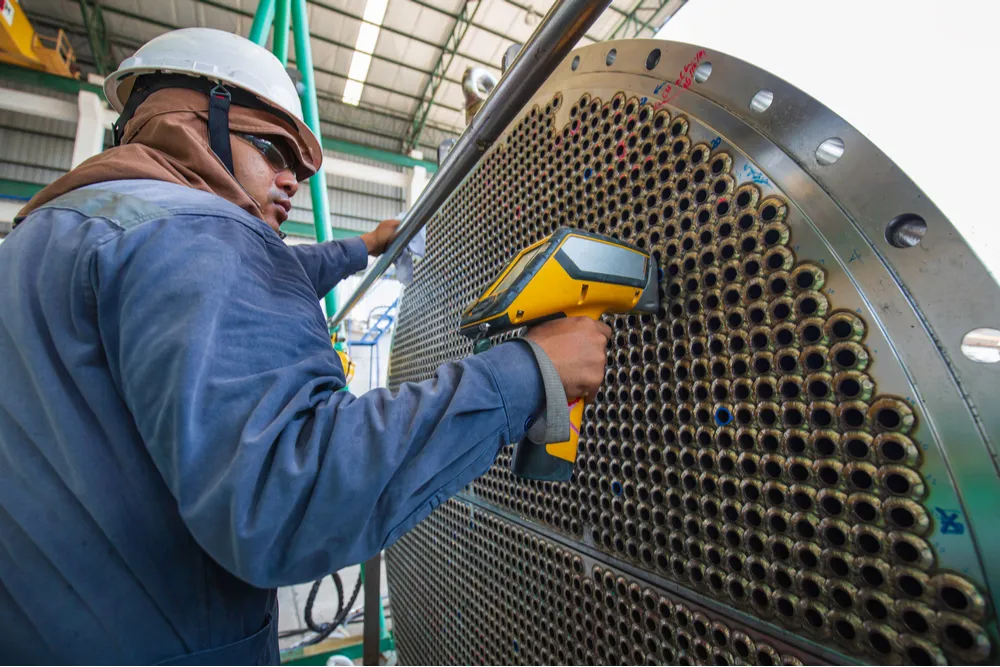
Heat exchangers are common equipment in the oil and gas industry and usually consist of a bundle or array of hundreds of tubes, which in many cases can be critical components in the continuous operation of the facility or process unit.
Air-cooled exchanger tubes are regularly inspected from the inside, although there is a non-invasive method in which these inspections are performed from the ends of the tubes, to detect thickness losses or other types of corrosion.
This article describes the non-destructive testing techniques applied in the evaluation of air-cooled heat exchanger tubes: Ultrasound using the IRIS (Internal Rotative Inspection System) technique, Acoustic Pulse Reflectometry (APR)Near Field Electromagnetic Test (NFET), Near Field Array (NFA) and Laser Optical Tube Inspection System (LOTIS).TM).
What is an air-cooled exchanger?
An air cooled exchanger or Fin Fan Cooler is a device used to cool fluids in various industrial processes. It consists of a bundle of finned tubes through which the fluid flows. Ambient air is forced or induced over the finned tubes by mechanical fans, which carry the heat from the fluid and cool it.
The name “Fin Fan” comes from the combination of fins (the extended surfaces attached to the tubes) and fans (the mechanical components used to move the air). These coolers are commonly used in applications where water availability or quality is limited or where process fluids need to be cooled without mixing with water. They are often seen in refineries, petrochemical plants, natural gas processing plants and other industrial facilities.
Each of the techniques applied in the inspection of air-cooled heat exchanger tubes is described below.
Techniques used in the inspection of air-cooled heat exchanger tubes
IRIS Ultrasound Technique
The IRIS technique, which stands for Internal Rotary Inspection System, is a technique within the ultrasonic testing method, which is often used in the oil and gas industry in the inspection of heat exchanger tubes, and other tubular components, and where there are limitations to the application of electromagnetic tests such as Eddy Current (ECT) and Remote Field (RFET), such as tubes in ferromagnetic materials (ECT) and in finned, grooved or turned tubes (ECT and RFET).
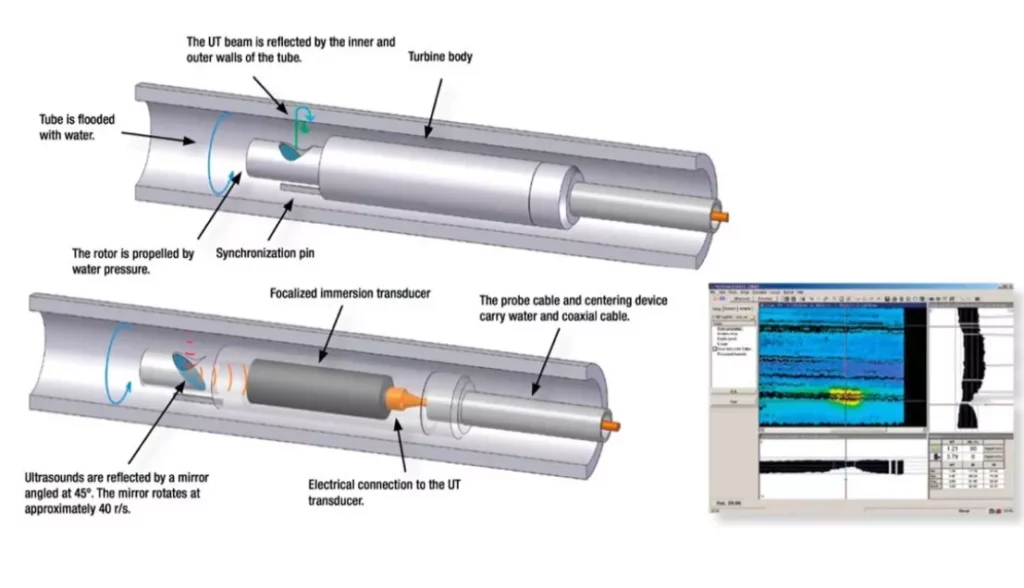
This technique makes use of the pulse-echo mode, i.e., a wave is emitted and a reflected echo is received from the outer wall of the tube through an axially oriented probe, and is used to measure wall thickness, material loss, and flaw orientations over a range of 0.5 to 3 in. in diameter.
The IRIS probe consists of a transducer that emits an ultrasonic wave in the axial direction of the pipe and through the water flowing in it. A mirror mounted on a turbine driven by the water flowing around the probe deflects the ultrasonic beam to obtain a normal incidence on the inner wall of the tube. Because the mirror rotates around the axis of the tube by the momentum of the water, the entire circumference of the component is examined.
A complete IRIS probe includes the cable, a centralization unit, a turbine and a transducer. The IRIS scanning speed is limited to 50 mm/s (2 in/s). On the other hand, the evaluation of heat exchanger tubes is performed using different B-Scan, C-Scan and D-Scan views.
Advantages and disadvantages
Some of the most outstanding advantages include:
- Accurate tube wall thickness measurements.
- High repeatability of results makes it ideal for monitoring tube thicknesses and determining tube life in the inspection of air-cooled heat exchanger tubes.
- Images in C – Scan presentation, which is a plan image showing the development of the tube sections as the probe advances; B – Scan, which is the development of the tube cross section at a given point along the length of the tube; and D – Scan, which is a view of the cross section seen in the axial direction of the tube and at a point on the perimeter of the tube.
- Use on any type of material.
Likewise, this technique also presents certain limitations such as:
- Low performance due to low sweep speed.
- It requires a constant and secure source of water.
- The assembly of the system requires many elements, some of which are very heavy.
- It does not detect cracks.
- It requires strict cleaning.
Acoustic Pulse Reflection Method (APR)
Acoustic Pulse Reflectometry (APR) is a non-invasive technique based on the measurement of the path and amplitude of one-dimensional acoustic waves propagating inside the tubes. Any change in the cross-sectional area of the tube creates a reflection that is recorded and analyzed in order to detect and evaluate defects.
The basic idea of the APR is to inject a broadband acoustic pulse into a tube from one end (Figure 4). As long as the pulse does not encounter geometric discontinuities, it will continue to propagate along the tube without causing reflections. When the pulse hits a discontinuity, such as blockages, expansions and perforations, a reflex is triggered. This reflection can be detected, measured, recorded and stored on a computer hard disk. The amplitude and shape of this reflection are determined by the characteristics of the discontinuity.
The APR creates a “virtual probe” that can navigate bends, spirals, elbows, fittings, etc. without difficulty, regardless of whether they are finned or grooved. This technology makes it possible to inspect heat exchanger tubes and other tubular components from a single point at the tube inlet in less than 10 seconds, saving considerable time and resources.
Advantages and disadvantages
The advantages of the Acoustic Pulse Reflectometry test include:
- The APR can be used to inspect tubes of any material (ferromagnetic, non-ferromagnetic, plastic, among others).
- Tubes in different shapes (straight, U-tubes, coils and coils) can be inspected.
- Very high performance.
- Closely accurate tube wall thickness measurements.
- It is not affected by structures such as support plates and tubesheets in the inspection tubes of air-cooled heat exchangers.
- Ability to inspect finned, grooved or turned tubes.
Its main limitations are:
- Only internal discontinuities in the tube can be detected.
- Greater expertise is required on the part of the inspector in evaluating the indications detected.
- It requires a high level of cleanliness.
- It does not detect cracks.
NFET Near Field Electromagnetic Test
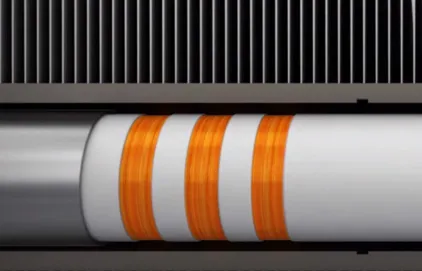
NFET field technology uses two coils: a transmitter and a receiver. Normally, the receiver coil is close to the transmitter coil, taking advantage of the transmitter’s near-field zone, i.e., the zone where the magnetic field of the transmitter coil induces strong eddy currents, axially and radially, in the tube wall.
NFET is specifically suited to detect corrosion, erosion and pitting inside carbon steel pipes. NFET is perfect for the inspection of finned carbon steel fan-cooled air-cooled exchanger tubes because eddy currents do not pass through the tube wall. NFET is also much more sensitive to defects near structures such as backing plates and tube plates.
Advantages and disadvantages
The main benefits of the NFET are:
- High performance.
- An external reference coil is not required.
- Easy to use.
- It is not affected by structures such as support plates and tubesheets in the inspection tubes of air-cooled heat exchangers.
- Crack detection (longitudinal).
Limitations of the NFET assay include:
- It only detects internal discontinuities.
- Low sensitivity in the detection of small pits and cracks.
- Applicable only in ferromagnetic materials.
Near Field Array (NFA)
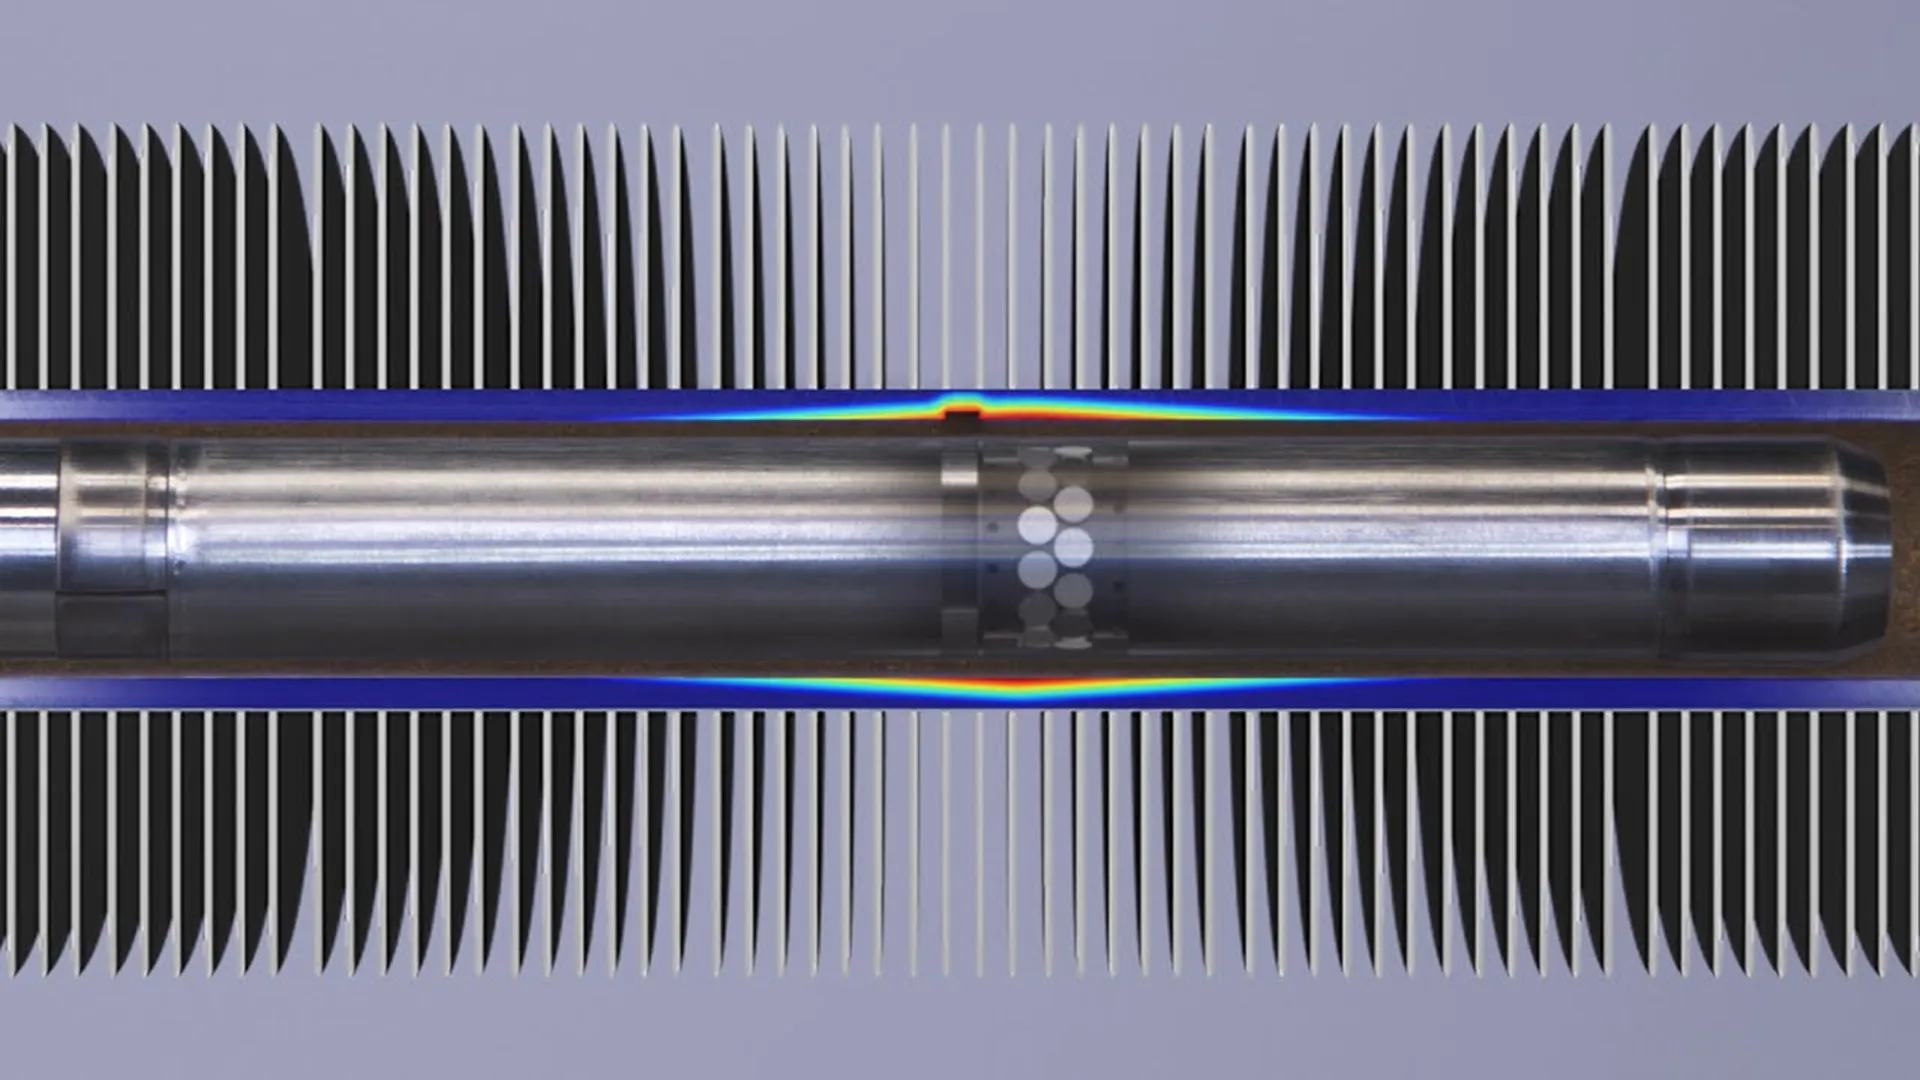
This is a variant of the NFET technique in which the probe has a coil array. NFA uses a technique similar to ECA (eddy current array testing) in which it makes use of a series of coils (up to 30 coils) that are activated in sequences. Unlike conventional eddy current tests, NFA tests use additional tangential coils that help to obtain detailed data and discontinuities in all directions.
The software allows NFA tube test data to be displayed and reported in 2D and 3D “C” scan format for corrosion mapping in air-cooled exchanger tube inspection that can help asset owners make informed decisions based on precise discontinuity location and discontinuity accuracy.
The following is a video about the Near Field Array (NFA) technology. Applied in the inspection of aluminum finned tubes of ferromagnetic heat exchangers commonly found in finned fan coolers. Courtesy of: Eddyfi Technologies.
Advantages and disadvantages
The main advantages of the NFA are as follows:
- High performance.
- It can provide 2D (C-Scan) and 3D corrosion mapping images in the inspection of air-cooled heat exchanger tubes to help the asset owner locate the exact location of the discontinuity and its precise size.
- It can accurately measure volumetric discontinuities of approximately 3 mm in a single pass.
- It can detect both axial and circumferential cracks.
- It can comfortably scan at 6 meters per minute, reducing heat exchanger maintenance downtime.
Among the limitations of the NFA are:
- They only detect internal stings.
- Applicable only in ferromagnetic materials
Laser Optical Tube Inspection System (LOTISTM)
Originally designed for use on marine boiler tubes for the U.S. Navy, LOTISTM (Laser Optical Tube Inspection System) was developed for the location and measurement of internal features such as corrosion, pitting and surface cracks.
In 1993, the technology was extended to the inspection of commercial systems, such as fossil boiler tubes, steam reformers and process heat exchanger tubes including air-cooled heat exchanger tubes. LOTIS, which employs a high-speed rotating laser calibrator, generates a computer graphic map of the inside surface of the pipe. Features such as DI erosion and pitting can be assigned with accuracies better than +- 0.002″.
Advantages
LOTIS technology offers the following benefits:
- High performance.
- High accuracy in measurements obtained with high resolution with accuracies better than +/- 0.0002″.
- High repeatability of the results, which makes it ideal for monitoring the thickness of the tubes and determining their useful life.
- It can provide 2D (C-Scan) and 3D corrosion mapping images in heat exchanger tube inspection to help the asset owner locate the exact location of the discontinuity and its precise size.
- It is not affected by structures such as support plates and tube plates in the inspection of heat exchanger tubes.
- Use in any type of material (ferromagnetic and non-ferromagnetic).
Disadvantages
The main limitations of LOTIS include:
- Requires operation in a dry environment.
- It only detects internal discontinuities.
- It requires a high degree of cleanliness.
Conclusions
Inspection of air-cooled heat exchanger tubes is a critical component of industrial maintenance and safety protocols. Non-destructive testing techniques play a key role in this process, allowing operators to detect defects and degradation without compromising the integrity of the tubes. Advanced methods such as IRIS, APR, NFET, NFA and LOTIS offer improved sensitivity, speed and accuracy, enabling industries to perform comprehensive inspections of air-cooled exchanger tubes and implement proactive maintenance strategies to mitigate risk, minimize downtime and optimize operational efficiency.
By leveraging these innovative technologies, industries can maintain the highest standards of safety, reliability and performance, protecting personnel, assets and the environment from potential hazards and ensuring sustainable operations for years to come.
References
- Daniel BOBROW, Noam AMIR. Non-Through Pipe Inspection; Accessed on February 07, 2024. https://www.ndt.net/events/PANNDT2015/app/content/Paper/19_Bobrow.pdf
- NOAM AMIR. Acoustic Pulse Reflectometry Brings an End to Tube Inspection Sampling; Accessed February 07, 2024. https://www.ndt.net/article/SINCE2011/papers/17_Amir.pdf
- BRIAN BERESFORD. Inspection of Heat Exchanger, Condenser & Fin Fan Coolers Tubes – An Update; Accessed February 07, 2024. https://inspectioneering.com/journal/2007-05-01/33/inspection-of-heat-exchanger-c
- ANDREAS BOENISCH, ABDUL RAHMAN TAQATEQ. Effective & Reliable Inspection of Fin-Fan Cooler Tubes; Accessed February 07, 2024. https://www.ndt.net/article/mendt2015/papers/MENDT2015_8.pdf
- EDDYFI. Near-Field Testing (NFT); Accessed on February 07, 2024. https://www.eddyfi.com/en/technology/nearfield-testing-nft
- ANTOINE GRÉGOIRE & DAVID AUBÉ. The Power of Near Field Array for Air Cooler Fin Fan Tube Inspection; Accessed February 07, 2024. https://blog.eddyfi.com/en/the-power-of-near-field-array-for-air-cooler-fin-fan-tube-inspection
- JAMES L. DOYLE. Rotating Laser Profilometry Adapted for Use in Convection Furnace Tubes, Boilers and Fin-Fan Coolers; Accessed February 07, 2024. https://inspectioneering.com/journal/1995-05-01/58/rotating-laser-profilometry-ad

