The oil and gas industry constitutes one of the main supports of the economy; therefore, the productive development of a country depends directly on its natural and non-renewable resources. The technical inspection represents one of the most important activities in the oil sector, whose performance is focused on determining the physical, mechanical and useful life of the inspected equipment, in order to schedule the change or repair of these assets.
An important part of the maintenance tasks of an industrial plant correspond to corrective or predictive maintenance. In other words, the equipment or installation is reviewed, analyses, measurements, data collection and even simple visual observations are carried out, and if abnormalities are found, or if the evaluation of a parameter is not adequate, the necessary actions are carried out to prevent and correct such irregularities.
For the oil industry, it is a priority to guarantee throughout the entire supply chain that both its personnel and its assets are protected and that its processes are optimized; that is, from extraction, which involves high pressures and temperatures, to regulatory inspection of production assets or all stages of hydrocarbon transportation, all subject to strict regulations and regulatory standards.
In this context, visual inspection (VT) represents one of the different control methods using non-destructive techniques; which can be defined as the examination of a material, part or product to evaluate its conformity using sight, alone or with the help of some tool. It is the first control of new equipment and also of those that are in service. It consists of checking the quality of the surfaces, revealing superficial defects during manufacturing and those that may form during its operation. Its objective is to detect and examine a wide variety of faults such as: abrasion, wear due to mechanical damage, manufacturing processes, corrosion, contamination, finish and joint discontinuities; such as welds, seals, welded connections, among others. Which are very common in the materials and equipment that make up the assets of the oil industry.
Principles of visual inspection
Description of visual and optical inspection
Visual and optical inspection uses energy from the visible part of the electromagnetic spectrum (figure 1). Changes in the properties of light after it comes into contact with the object being inspected. Detection can be performed or enhanced by the use of mirrors, amplifiers (magnifiers), endoscopes, and other visual aids or instruments.
In visual and optical inspection, the physical phenomenon used is light, which is found in the portion of the electromagnetic spectrum, with frequencies between 370 and 770 nm (nanometers), which is capable of exciting the human retina
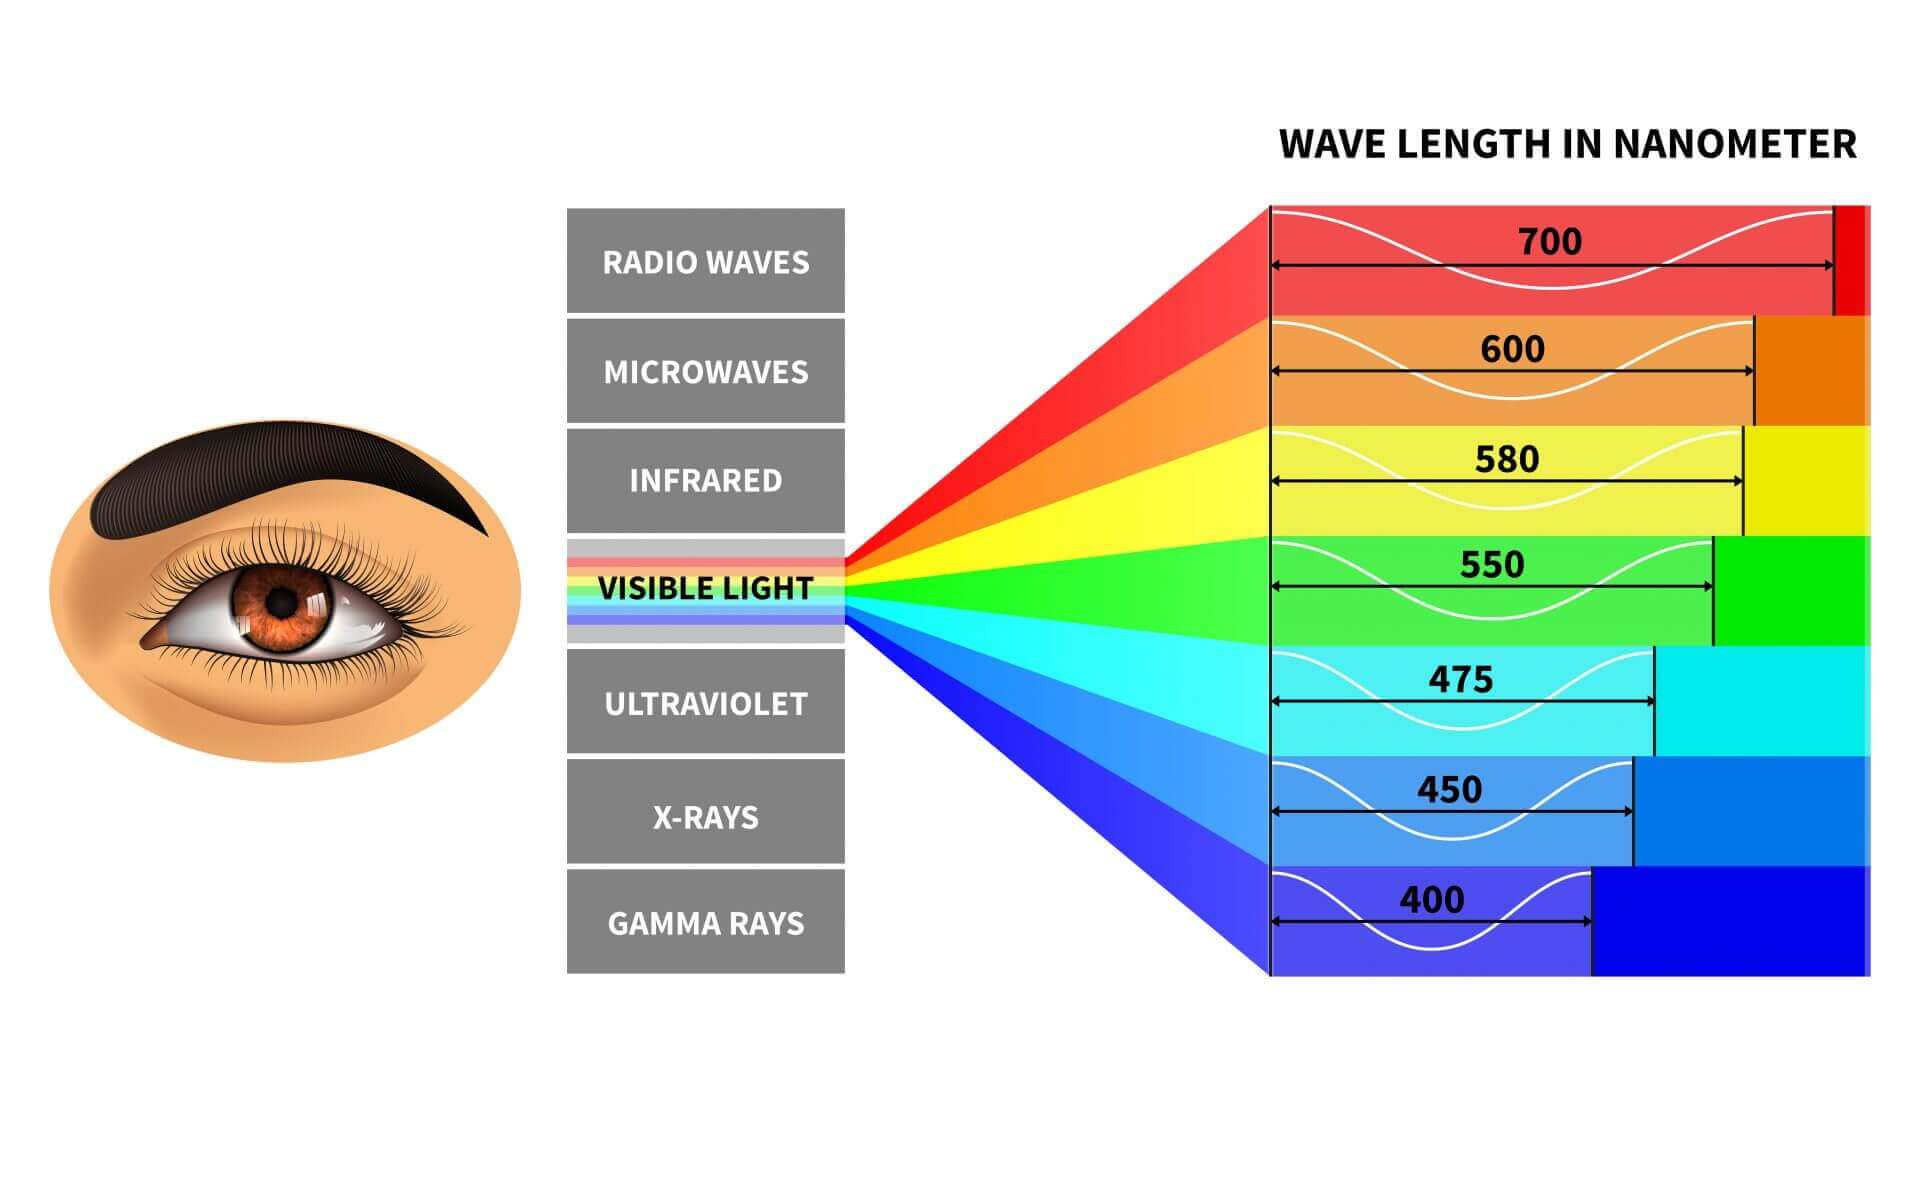
Image formation
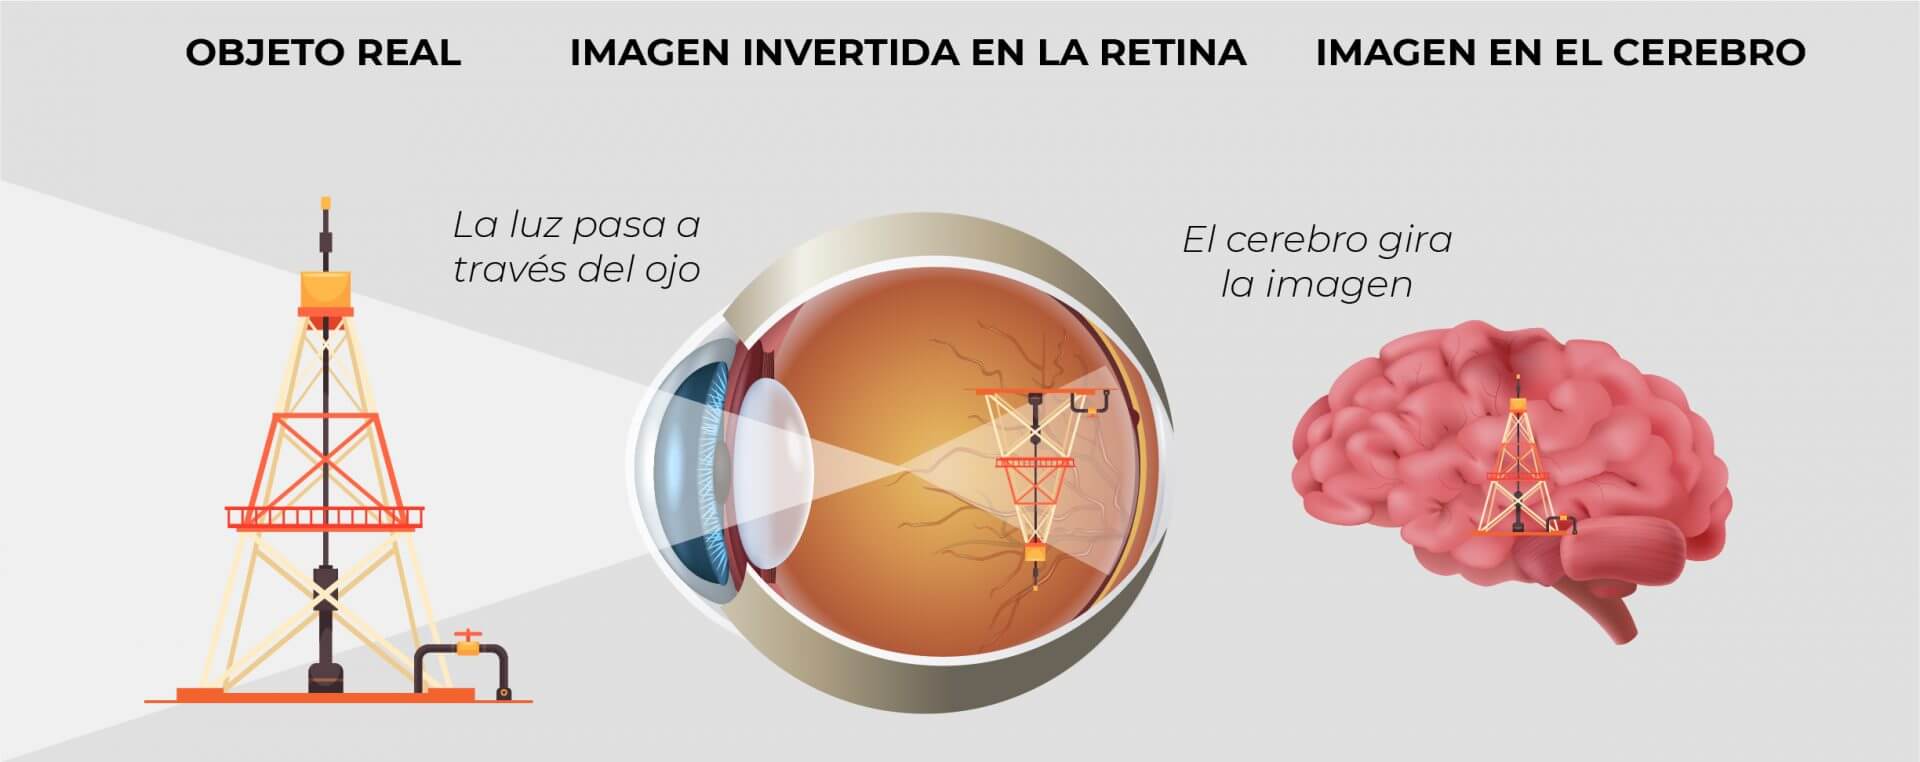
The image of an object is formed in the human eye (figure 2), or other light-sensitive accessory; most optical instruments are designed to create images.
In visual and optical inspection systems it is the human eye; which, has a variety of automatic adjustments, that allow it to adapt and provide a defined vision, even varying the distance through a range of lighting intensities. This optical tool can be compared to a radiation detector, performs frequency analysis and measures amount and direction. Light is invisible until it encounters an object and is reflected back to the eyes. Its components and their main functions for vision can be compared to the parts of a camera.
The eye’s ability to adapt to different light conditions is due to the operation of the pupil and iris under certain conditions. It is the only non-destructive testing method that has its own identity and will always be present or binding with respect to other tests.
In many cases, the manner in which the image is formed and its proportion can be determined by geometry and trigonometry, without detailed consideration of the physics of light rays. This technique is known as “geometrical optics”, which includes the formation of images by means of lenses and mirrors.
Visual inspection (VT) procedures and requirements
The result of a visual inspection depends on the degree of knowledge and experience that the person has about the inspected object; hence, this non-destructive testing method will depend on the “Expertise” of the inspector. In the oil industry, recognizing whether the plates or trays of a fractionation tower are in good condition will depend on experience, knowledge acquired about pressure equipment (API 510), in order to characterize and determine, under acceptance and rejection criteria, the existing conditions in these units.
With respect to other Non-Destructive Testing (NDT) methods, it plays a very important role when used to visually acquire the information provided by other methods or when applied before subjecting the material to another test; which allows to identify insignificant irregularities that can give rise to false indications.
For the application of the visual inspection method it is required to have a good knowledge about:
- Functioning of the human eye.
- The vision and its mechanisms.
- Light, its measurement, its evaluation and dependence on the work to be done.
- Color and its perception.
- Auxiliary means of inspection (magnifying glasses, endoscopes, among others).
A common application of visual inspection is to determine, among other aspects, the surface condition, the alignment of mating surfaces, the protection of parts, the degree of finish of a weld bead, the evidence of leaks and to allow inspection in ducts. closed etc
To carry out a good visual inspection, great experience and familiarity with the piece is required, that is, not looking but observing and also knowing what to see or what to look for. It is then, the most important non-destructive testing (NDT) method, because it is the main inspection method, the most used and is present in the rest of the existing NDTs and those that will exist in the future for the oil & gas industry. and the like.
Below is a graphical representation of the visual inspection process.

Figure 3 shows the phases for executing a visual inspection procedure: The first represents the preliminary step before cleaning and the second a subsequent step; where the preliminary phase is characteristic of a qualitative inspection of the conditions of the asset and the other is the execution phase of the quantitative inspection that generates measurable results and that serve to feed the acceptance and rejection criteria of what was inspected. This process is applied and repeated every time a specimen is required to be inspected for the oil and gas industry, so it tends to be practical and truthful with the support of standardized work procedures endorsed by API, ASME, AWS, ISO 9000. , others; that make these inspection activities reliable and safe.
Visual inspection methods
Direct visual inspection (or examination) is outlined in the ASME Code, for Pressure Vessels and Boilers, Section V, Non-Destructive Testing, Article 9, and is defined as:
Direct Visual Inspection
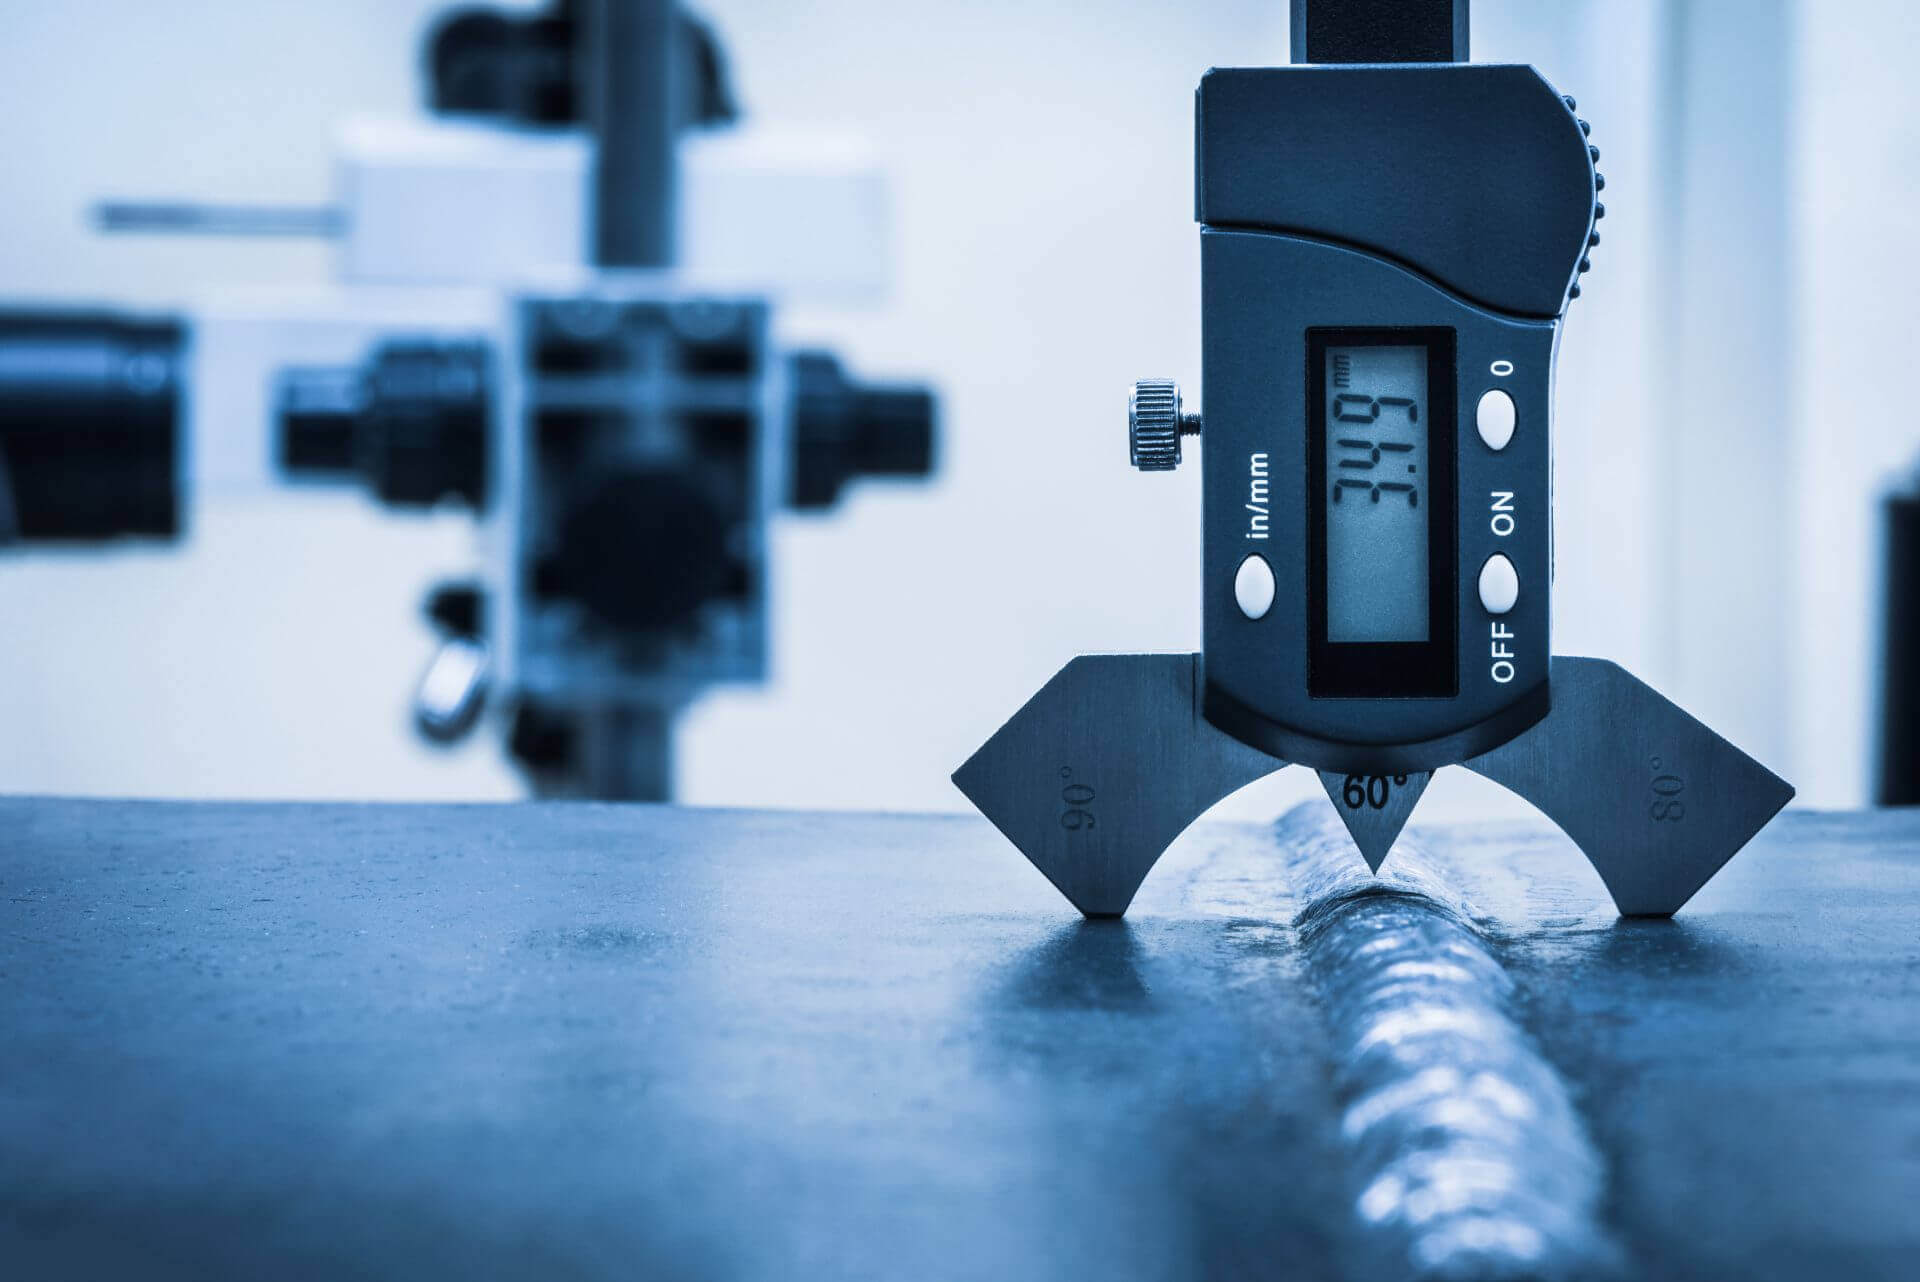
It is carried out at a short distance from the object, making the most of the inspector’s natural visual ability. It can usually be done when the access is sufficient to place the eye within 24 inches (600 mm) of the surface to be examined and at an angle of no less than 30 degrees to the surface to be examined. Mirrors may be used to improve the viewing angle; Some auxiliary tools and equipment can also be used, such as: Magnifying glasses, mirrors, welding gauges and meters.
Examples of direct inspection:
- Weld inspection (figure 4).
- Paint anchors.
- Cleaning required for other NDTs.
Remote (or indirect) visual inspection
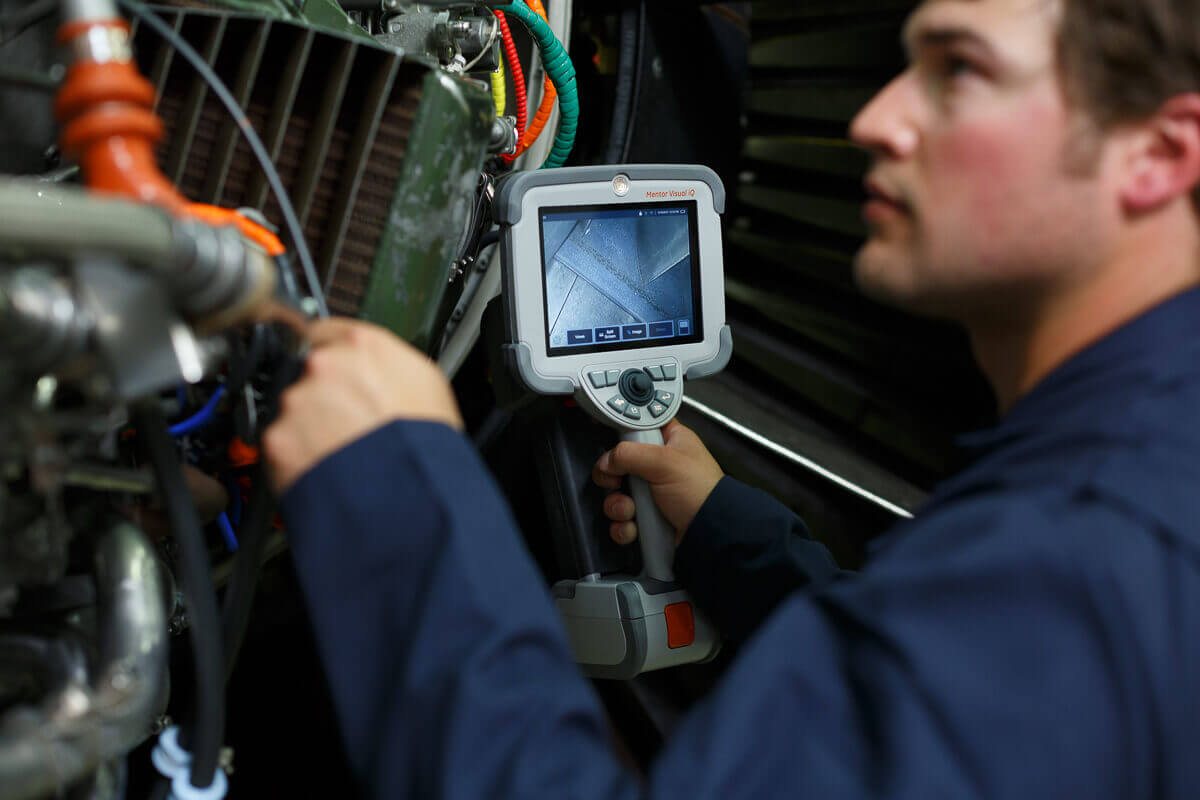
It is used in those cases where there is no direct access to the components to be inspected, or in those components in which, due to their design, it is very difficult to gain access to their internal cavities. It is a method used in non-destructive testing to visually detect cracks, fissures and discontinuities in surfaces, in areas inaccessible to the human eye, such as the interior of a pipe or the interior of a sealed tank, without the need to dismantle the pipe or tank. Remote visual examination can use visual aids such as: Telescopes, Borescopes, Robots, Zoom Cameras or other suitable instruments; which must have a resolution capacity at least equivalent to that obtained by direct visual observation.
Examples of indirect inspection:
- Internal inspection of a cemented pipe to evaluate the cement adhesion conditions.
- Internal conditions of the heat exchanger tubes and observe pitting or erosion due to corrosion.
- Inspection of turbine blades.
Use of drones as a remote visual inspection (RVI) tool
The oil and gas industry is witnessing unprecedented challenges, such as declining oil prices, early maturity of giant oil and gas fields, shortages of skilled labor, and remote locations of new resources. conventional and unconventional. The main objective of the oil and gas industry is to reduce costs and optimize its operations through smart investments in the latest technologies. Drones and robots will not only reduce the cost of operating oil and gas assets, but also reduce human effort and the time it takes for one person to perform the same activities. Companies are using drones with the goal of significantly reducing injuries and fatalities during internal inspections. In addition to savings, safety is one of the biggest benefits of using drones for indoor inspections.
When using a drone in confined spaces (figure 6); These devices can replace inspectors to obtain visual data, in this case, inspectors do not have to enter these confinements to collect information, reducing the need to enter potentially dangerous locations within assets such as: boilers, pressure vessels or chimneys, tanks, among others.
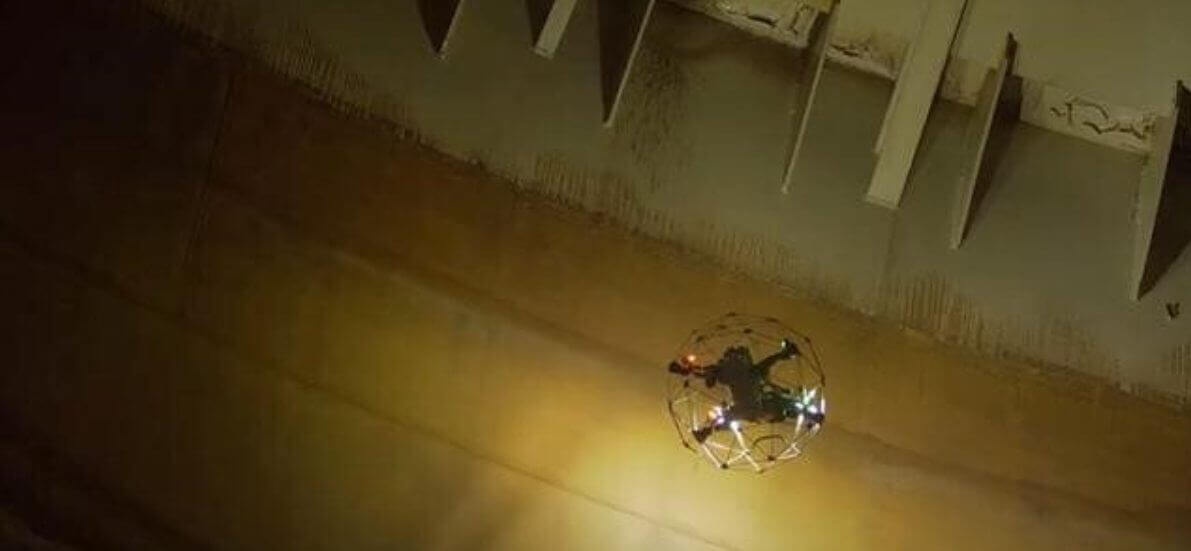
Using a drone as a RVI ( Remote Visual Inspection ) tool eliminates most of the need for human input and thus significantly improves worker safety. Offering an effective way to inspect infrastructure, drones also significantly reduce inspection costs compared to manual inspection or other robotic alternatives.
In visual inspection inspections carried out by a drone through the camera, it replaces the human eye of the inspector. This “remote eye” function can take place either in real time during the flight itself, or after downloading the data collected during the flight to study them in detail.
It is important to highlight that, although visual inspections are the ones that have most rapidly adopted the use of drones, there are other inspection fields where the application of these aircraft has been used as a work tool, facilitating the work of many professionals.
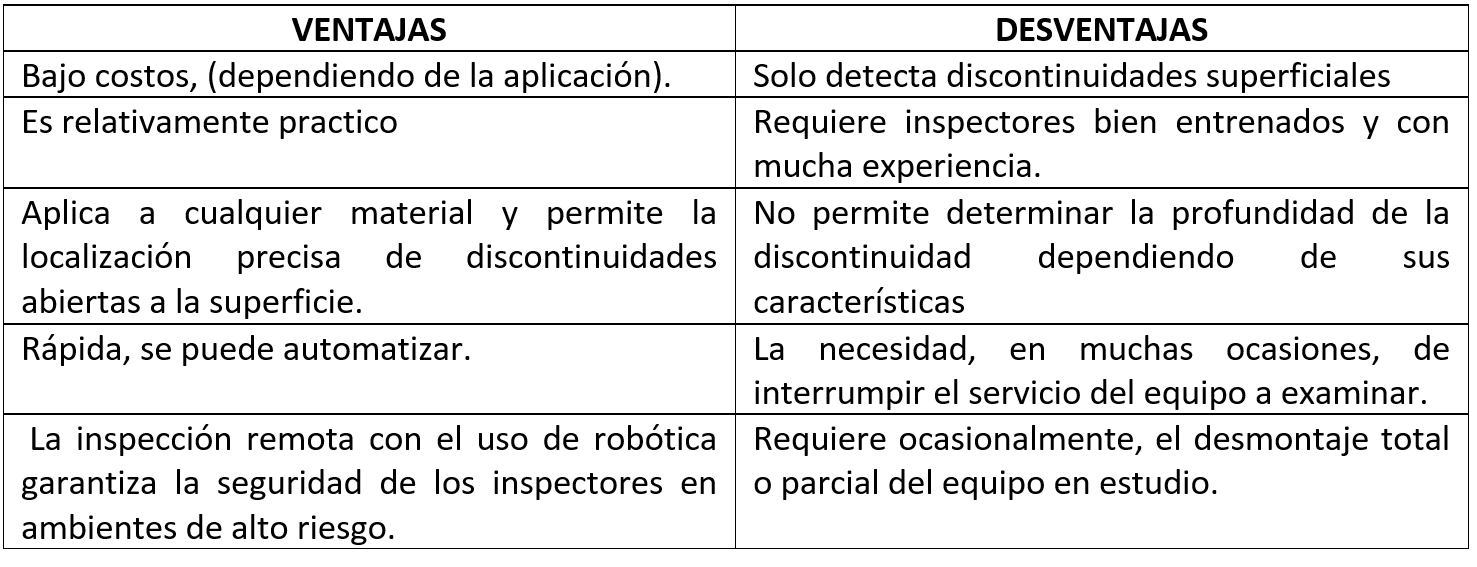
Advantages and disadvantages of the visual inspection method
In the following table, a summary of the most important advantages and disadvantages of the visual inspection method is presented.
Applications in industry
Inspection by visual inspection has a wide range of possibilities and capabilities, giving it unique versatility in product quality controls, both in manufacturing and in service. Within the wide range of applications for visual inspection in the industry, the following areas should be highlighted:
- Detection of surface anomalies such as scratches, excess roughness and areas not covered by paint or coating.
- Precision measurements and dimension checking.
- Visual inspection of welding in manufacturing (quality control of the finish, shape and size).
- Mechanical inspection of all types of pipe supports during assembly and operation.
- In-service inspection of equipment and components, from heat exchangers to bolts.
- Leak detection in piping systems and flanged joints.
- Detection of corrosion, erosion and/or service degradation in pumps, valves, pipes, structures, etc.
- Control of the finish of components during manufacturing: surface condition, absence of defects, assembly, packaging, etc.
- Detection of foreign objects inside equipment and components that may affect their function.
- Detection of cracks in metallic structures.
Conclusion
Visual inspection is the most important non-destructive testing (NDT) method, because it is the main inspection method, the most used and is present in the rest of the existing NDTs and those that will exist in the future for the oil industry. gas and related.
Its importance also resides in each one of the aforementioned aspects, because the success of the results of an inspection goes according to the inspector’s expertise, his training and knowledge in the management of international standards and codes applicable to equipment and/or industry assets, to the effective way of managing design information, failure histories, drawings, changes and in the writing of reports and/or inspection reports; highlighting the points of excellence that qualify the good equipment inspector and all this related to the visual inspection.
References
- https://ingeniero-de-caminos.com/ensayos-no-destructivos-en-soldadura/
- Visual Inspection Course Level I, American Society for Non Destructive Testing (ASNT).
- Teaching materials; https://youtu.be/48XY_TkVGIw
- ASME SECTION V. Non-destructive testing.
- Tecnitop.com/es/diesel-tank-inspection-with-elios-2/.

