Introduction
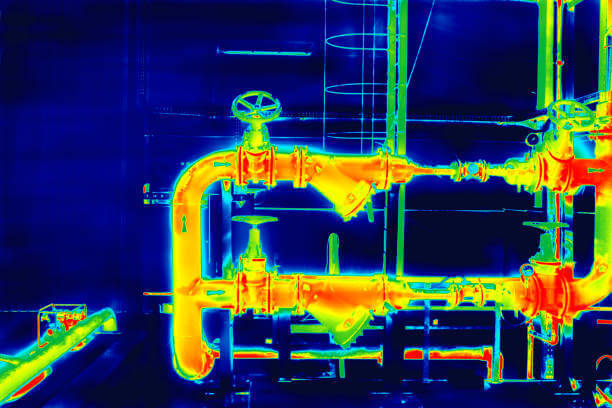
Thermography is a Non-Destructive Testing Method (NDT), used to determine remote temperature points; through the detection or capture of infrared radiation of the electromagnetic spectrum.
Thermographic systems and equipment make very precise measurements of temperature values; without the need for physical contact with the object or equipment to be studied, its principle is based on the use of infrared technology, so they have the ability to measure the thermal distribution of an object at a distance or in motion, even inside furnaces, reactors or reformers. The ASTM E1316 Standard1 defines thermography as: “the process of displaying the actual temperature (variations in temperature or emissivity, or both) on the surface of an object or an environment by measuring variations in infrared radiation”.
By using this method, a thermal image called a thermogram is obtained; in which the thermal distribution of all the components of a system is obtained; and establishes the temperature present at each point on the surface of the stationary or moving object, instantly and at a safe distance; which is of great importance when there are high temperatures, poisonous gases, electric current, among other situations, that are of high risk in the place where the measurement is made2. One of the most important advantages of this method is that it allows inspections to be carried out without loss or reduction in productivity because they are carried out during the operational service of the system.
Thermography is one of the most used methods by the equipment inspector in plants in service, to verify the existing conditions of any asset, and evaluate its operating conditions through a thermographic analysis; in order to predict its operational reliability.
Emission-Reflection-Transmission
Through the use of cameras with thermographic sensors, information is obtained on the exact temperature of an object. This happens as follows: thermographic cameras capture infrared radiation from the electromagnetic spectrum, converting the radiated energy into temperature information. The infrared radiation detected by the thermographic camera is emitted by the objects present in the viewing angle of the camera; which have specific characteristics that can influence the infrared temperature measurement to several degrees.
The radiation recorded by a thermographic camera is composed of radiation: Emitted (ɛ), Reflected (ρ) and Transmitted (τ), coming from the objects present in the field of vision of the camera. In figure 1, the graphic schematic representation of the mentioned process is shown in a general way3. The camera reads the apparent incoming infrared energy and determines the outgoing infrared energy, based on distance, relative humidity and atmospheric temperature data, then subtracts the reflected infrared energy and thus estimates the emitted infrared energy based on the reflected ambient temperature and surface emissivity data.
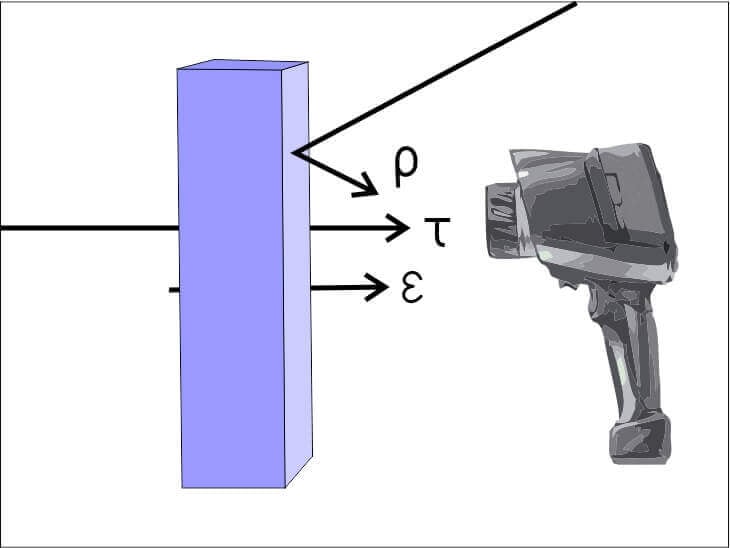
Figure 1. Radiation measured by thermographic camera: Emission (ɛ), Reflection (ρ) and Transmission τ).
Thermographic cameras or thermographs are sophisticated technological devices that manage to capture the exact temperature of objects or spaces through a heating system. These devices continuously record the temperature by infrared radiation.
Application of thermography
Thermography is one of the most used Non-Destructive Tests (NDT) with plants in service, and applies in the following cases:
- Inspection of the temperature of the surface of the tubes of the furnaces to determine hot or cold zones with respect to the rest of the length of the tubes; caused by plugging, lack of flow or other pertinent analysis deviation.
- Determination of the temperature of the wall of furnaces to detect hot spots; caused by detachment of the internal refractory.
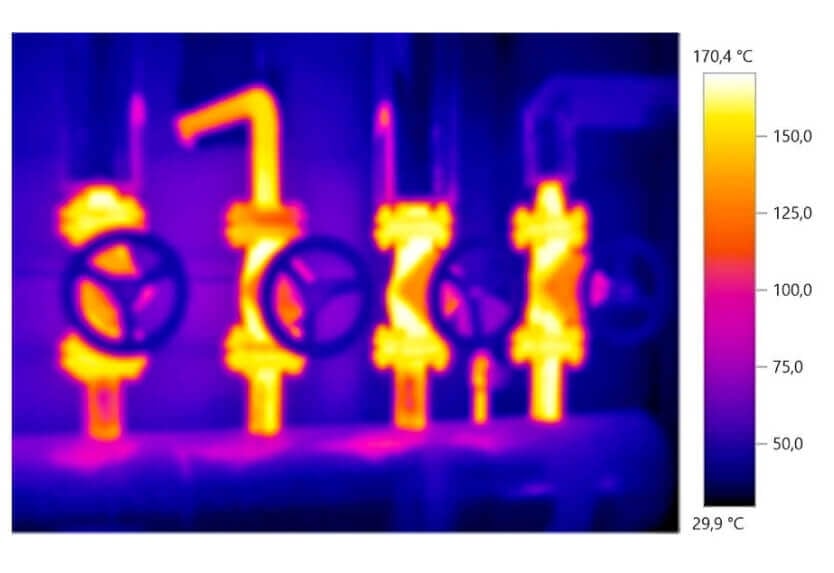
- Detect blockages in pipes and obstructions in gate valves (figure 2), and note that only one is open and the other three are closed.
- Detect flooding and vapor-liquid zones in the operation of a fractionation tower. For example, the gasifier in a coker plant and its main lines.
- Detect hot spots in furnace chimneys; by detachment, cracking or loss of the thickness of the internal refractory that protects it.
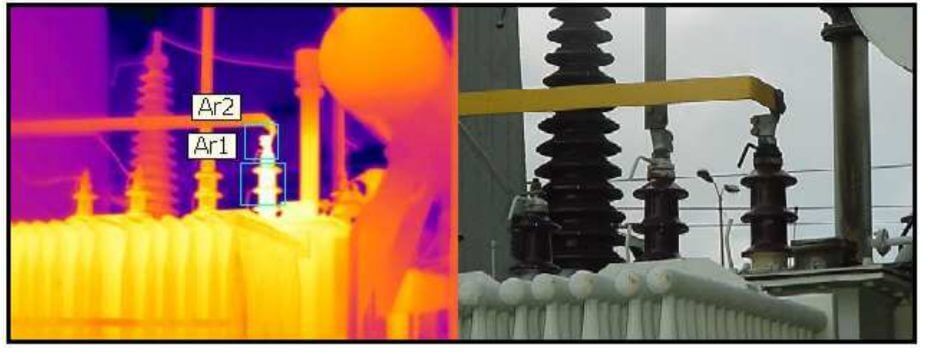
- Detect hot spots in power lines, fuse boxes, electrical boxes; caused by loose elements, deterioration or damage and other pertinent elements of analysis. In Figure 3, the detection of problems in the electrical components is observed.
- Inspection of the condition of motors and pumping equipment, through thermal images it is possible to detect overheated motors, overloaded pumps, hot bearings or lubrication problems. Detecting these problems can help prevent other more serious and costly damage from occurring. for repair. In figure 4, the thermography of a rotating equipment is shown: where the temperature behavior of the element is shown.
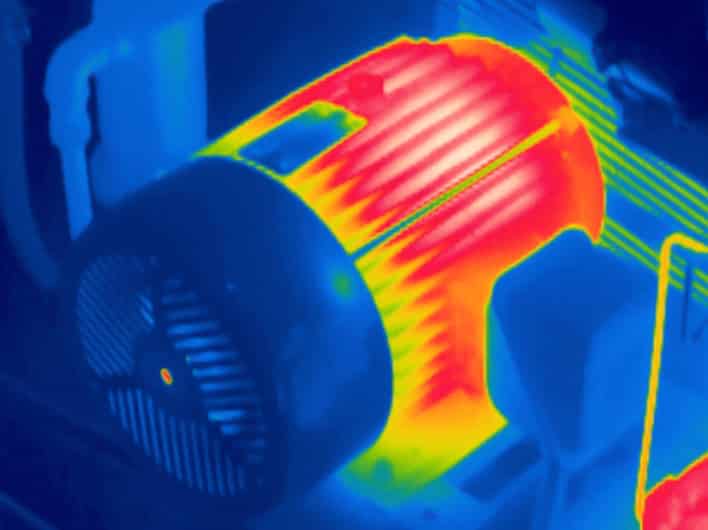
Figure 4. Thermography of a rotating equipment with damage.
Conclusion
The implementation of the infrared thermography method in the different business sectors allows for quick measurements, non-destructive (and non-invasive) evaluations, through a basic principle of control and estimation of thermal changes on a surface, thus guaranteeing reliability and asset integrity. For this reason, this technology is presented as an excellent alternative for performing predictive and preventive maintenance.
References
- ASTM E1316. Standard Terminology for Nondestructive Examinations.
- Level I Thermography Course, American Society for Non Destructive Testing (ASNT).
- VERATTI, Attílio Bruno. Introduction Course and Applications of Infrared Thermography.

